Let's face it...with all of the massive growth and innovations in our sport, one question that *most* people will eventually consider is, "should I get a kayak trailer?"...
Trouble is, even a base model kayak trailer is expensive - a lot of times, prohibitively so...
So if you're reading this, I'll assume you're thinking about taking the plunge, but maybe you're still considering your options about what's [realistically] within your means, or if you should just keep grinding it out in the bed of your truck.
Both options have their place, and no matter what anyone tells you, neither is better than the other - and here's why...
If you get a trailer, the biggest advantages are, you'll be able to kick it into [and load out of] the water without breaking your back, you won't have to struggle with getting your rig onto a cart by yourself, and you'll usually save a lot of time rigging up because you'll be able to keep a lot of gear in your kayak.
But using a trailer does have a few downsides...
Serious off-roading isn't usually possible
Parking and maneuvering can be a challenge...especially in tiny one-way motel parking lots in tiny one-way towns...
Purchase, registration, and maintenance costs
Most small trailers aren't built to go over 45-55 mph
Boat ramp parking fees can cost more with a trailer
When you're on the road for a national event, and have a hub blowout on a Saturday night in a little town, you have to wait until the store opens late Sunday morning before you can get back on the road to compete for day two...or so I've heard...
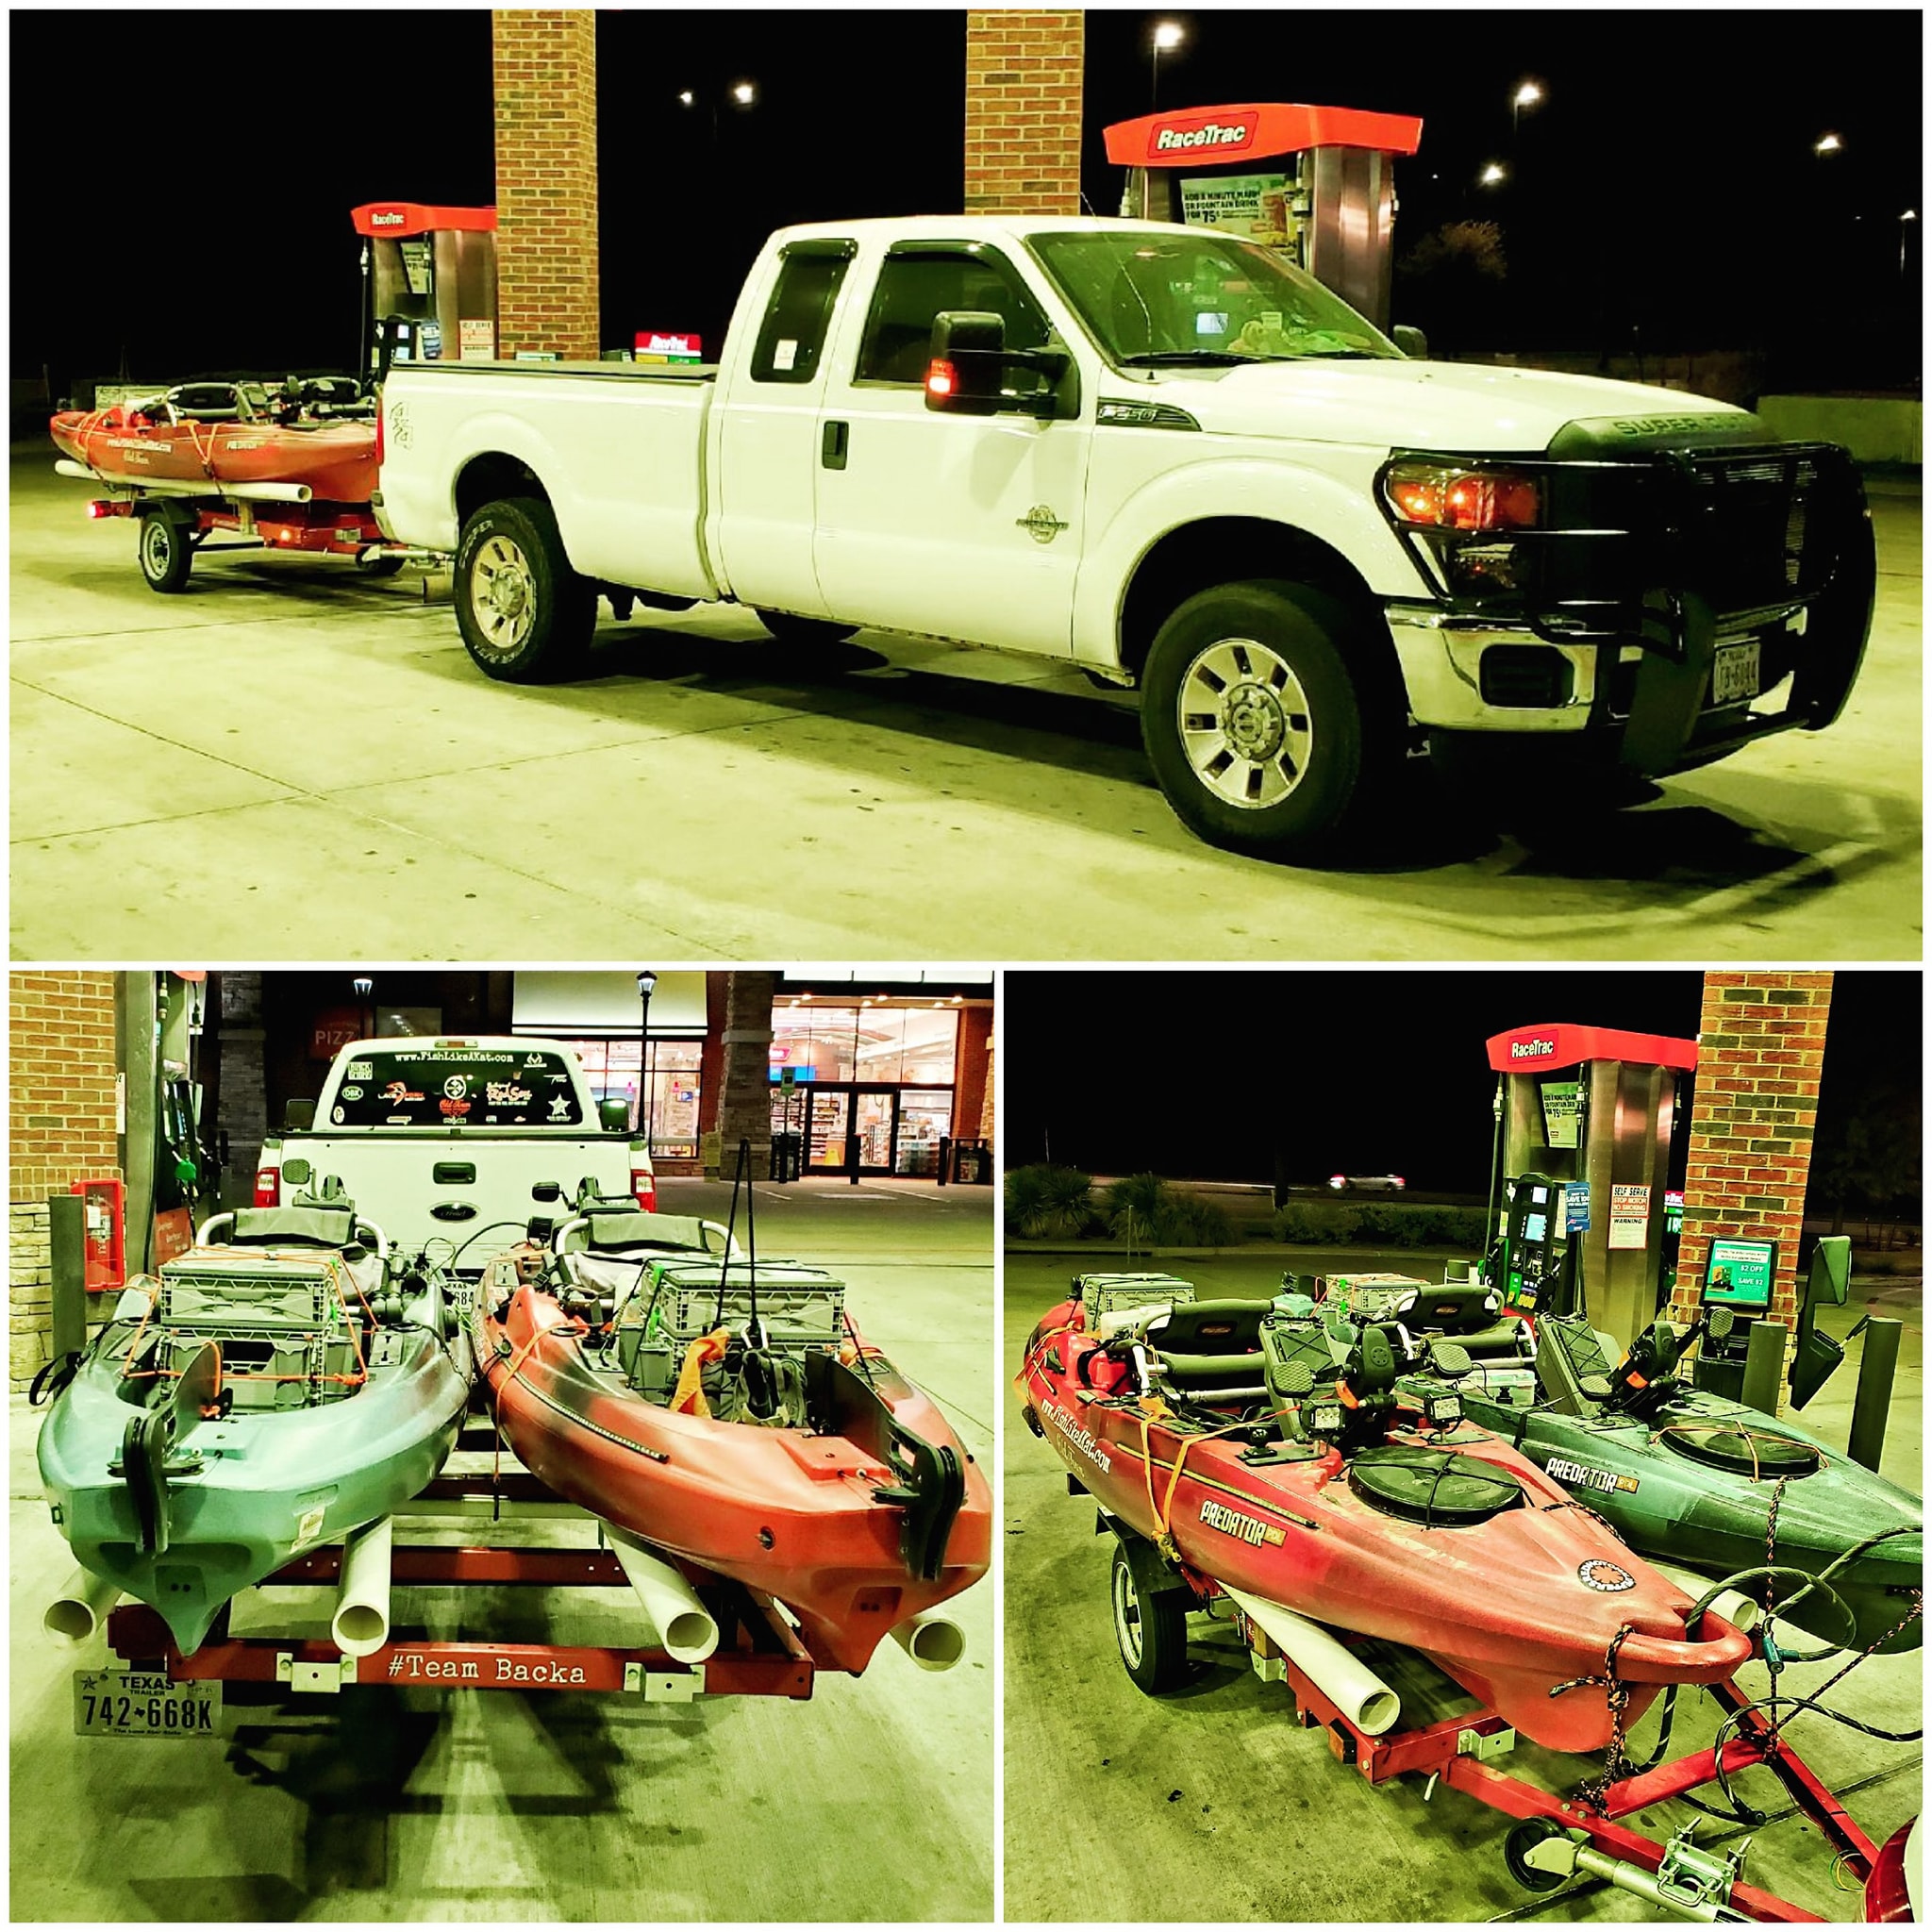
For the first three years we started kayak fishing? We bed-loaded both of our kayaks.
It wasn't easy, and it wasn't quick, but it was a decent workout - especially when you have to get off the ramp in a hurry.
But now it's been almost two years since we decided to build our own kayak trailer - and man, have we learned a lot about all sides of the matter...
This part I of II article will show you how we saved $1,800.00 building a "standard" kayak trailer...
Part II will show you the upgrades we added to that same trailer to make it stronger, faster, and more secure - while still saving almost $800.00!
All without having to weld a thing.
So after a lot of trial and error, I think it's about time that we show y'all how to save a little a lot of money, building your own kayak trailer!
***Please keep in mind that while these methods work for us, this information is for reference only***
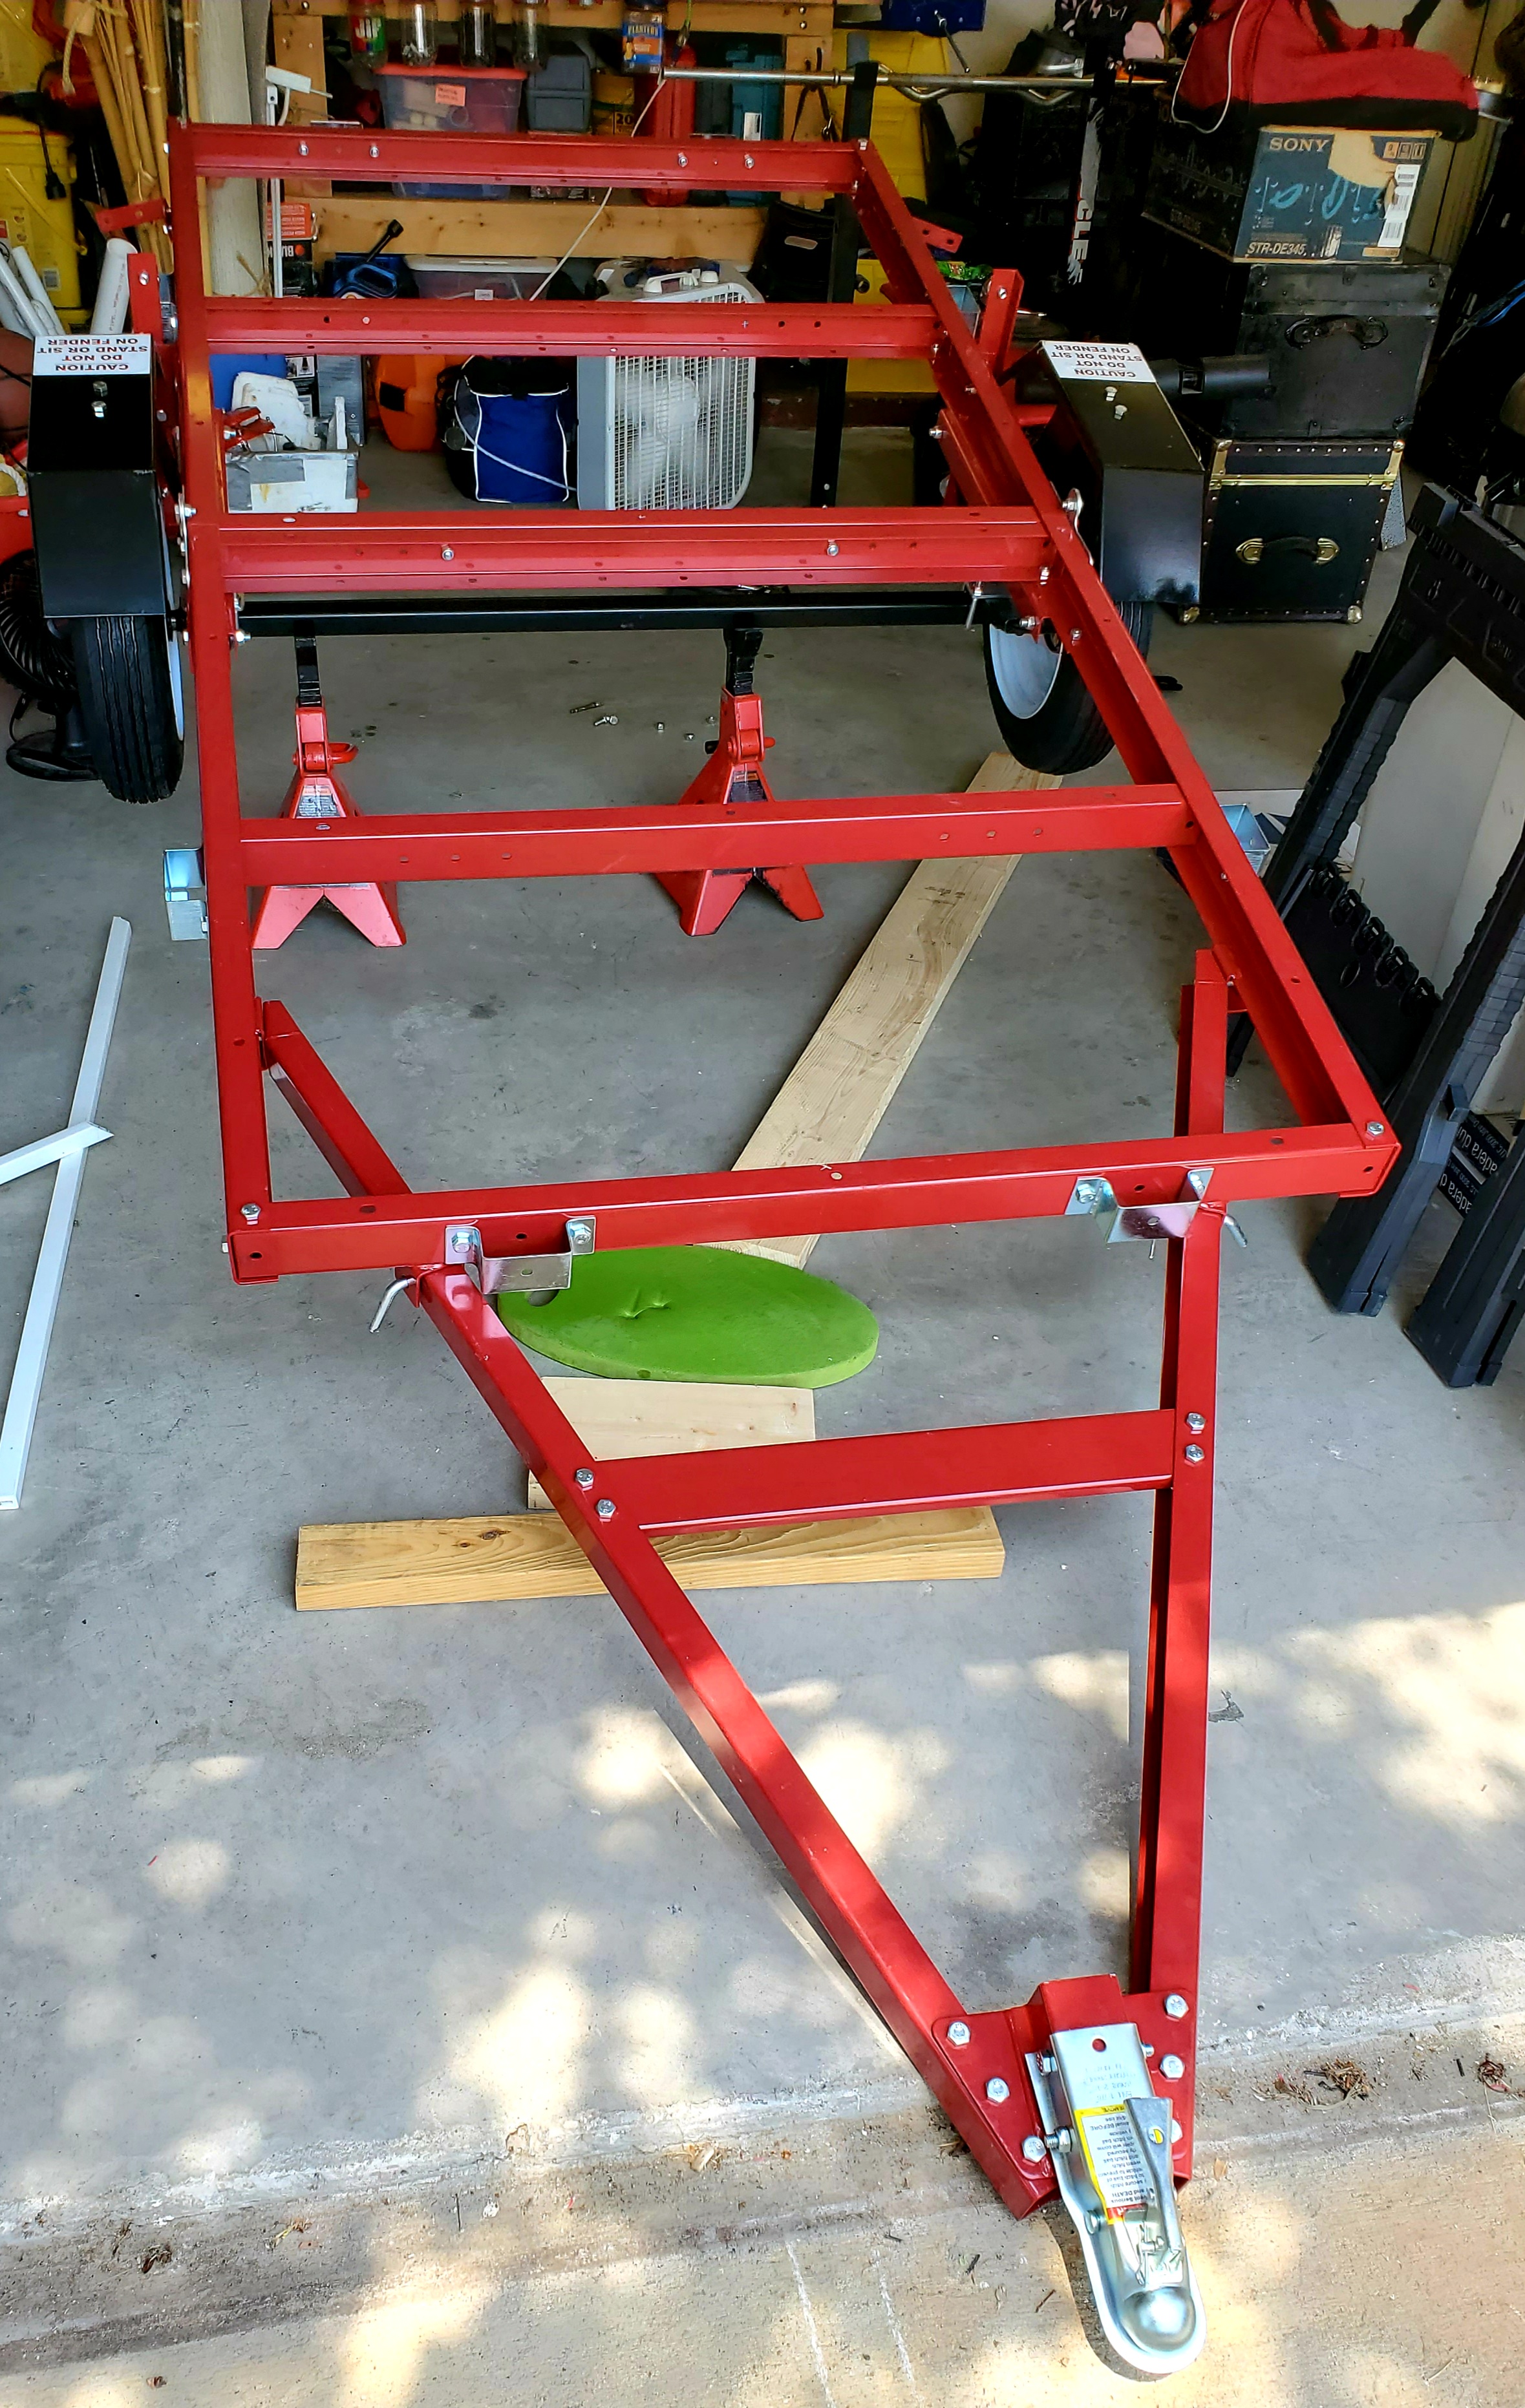
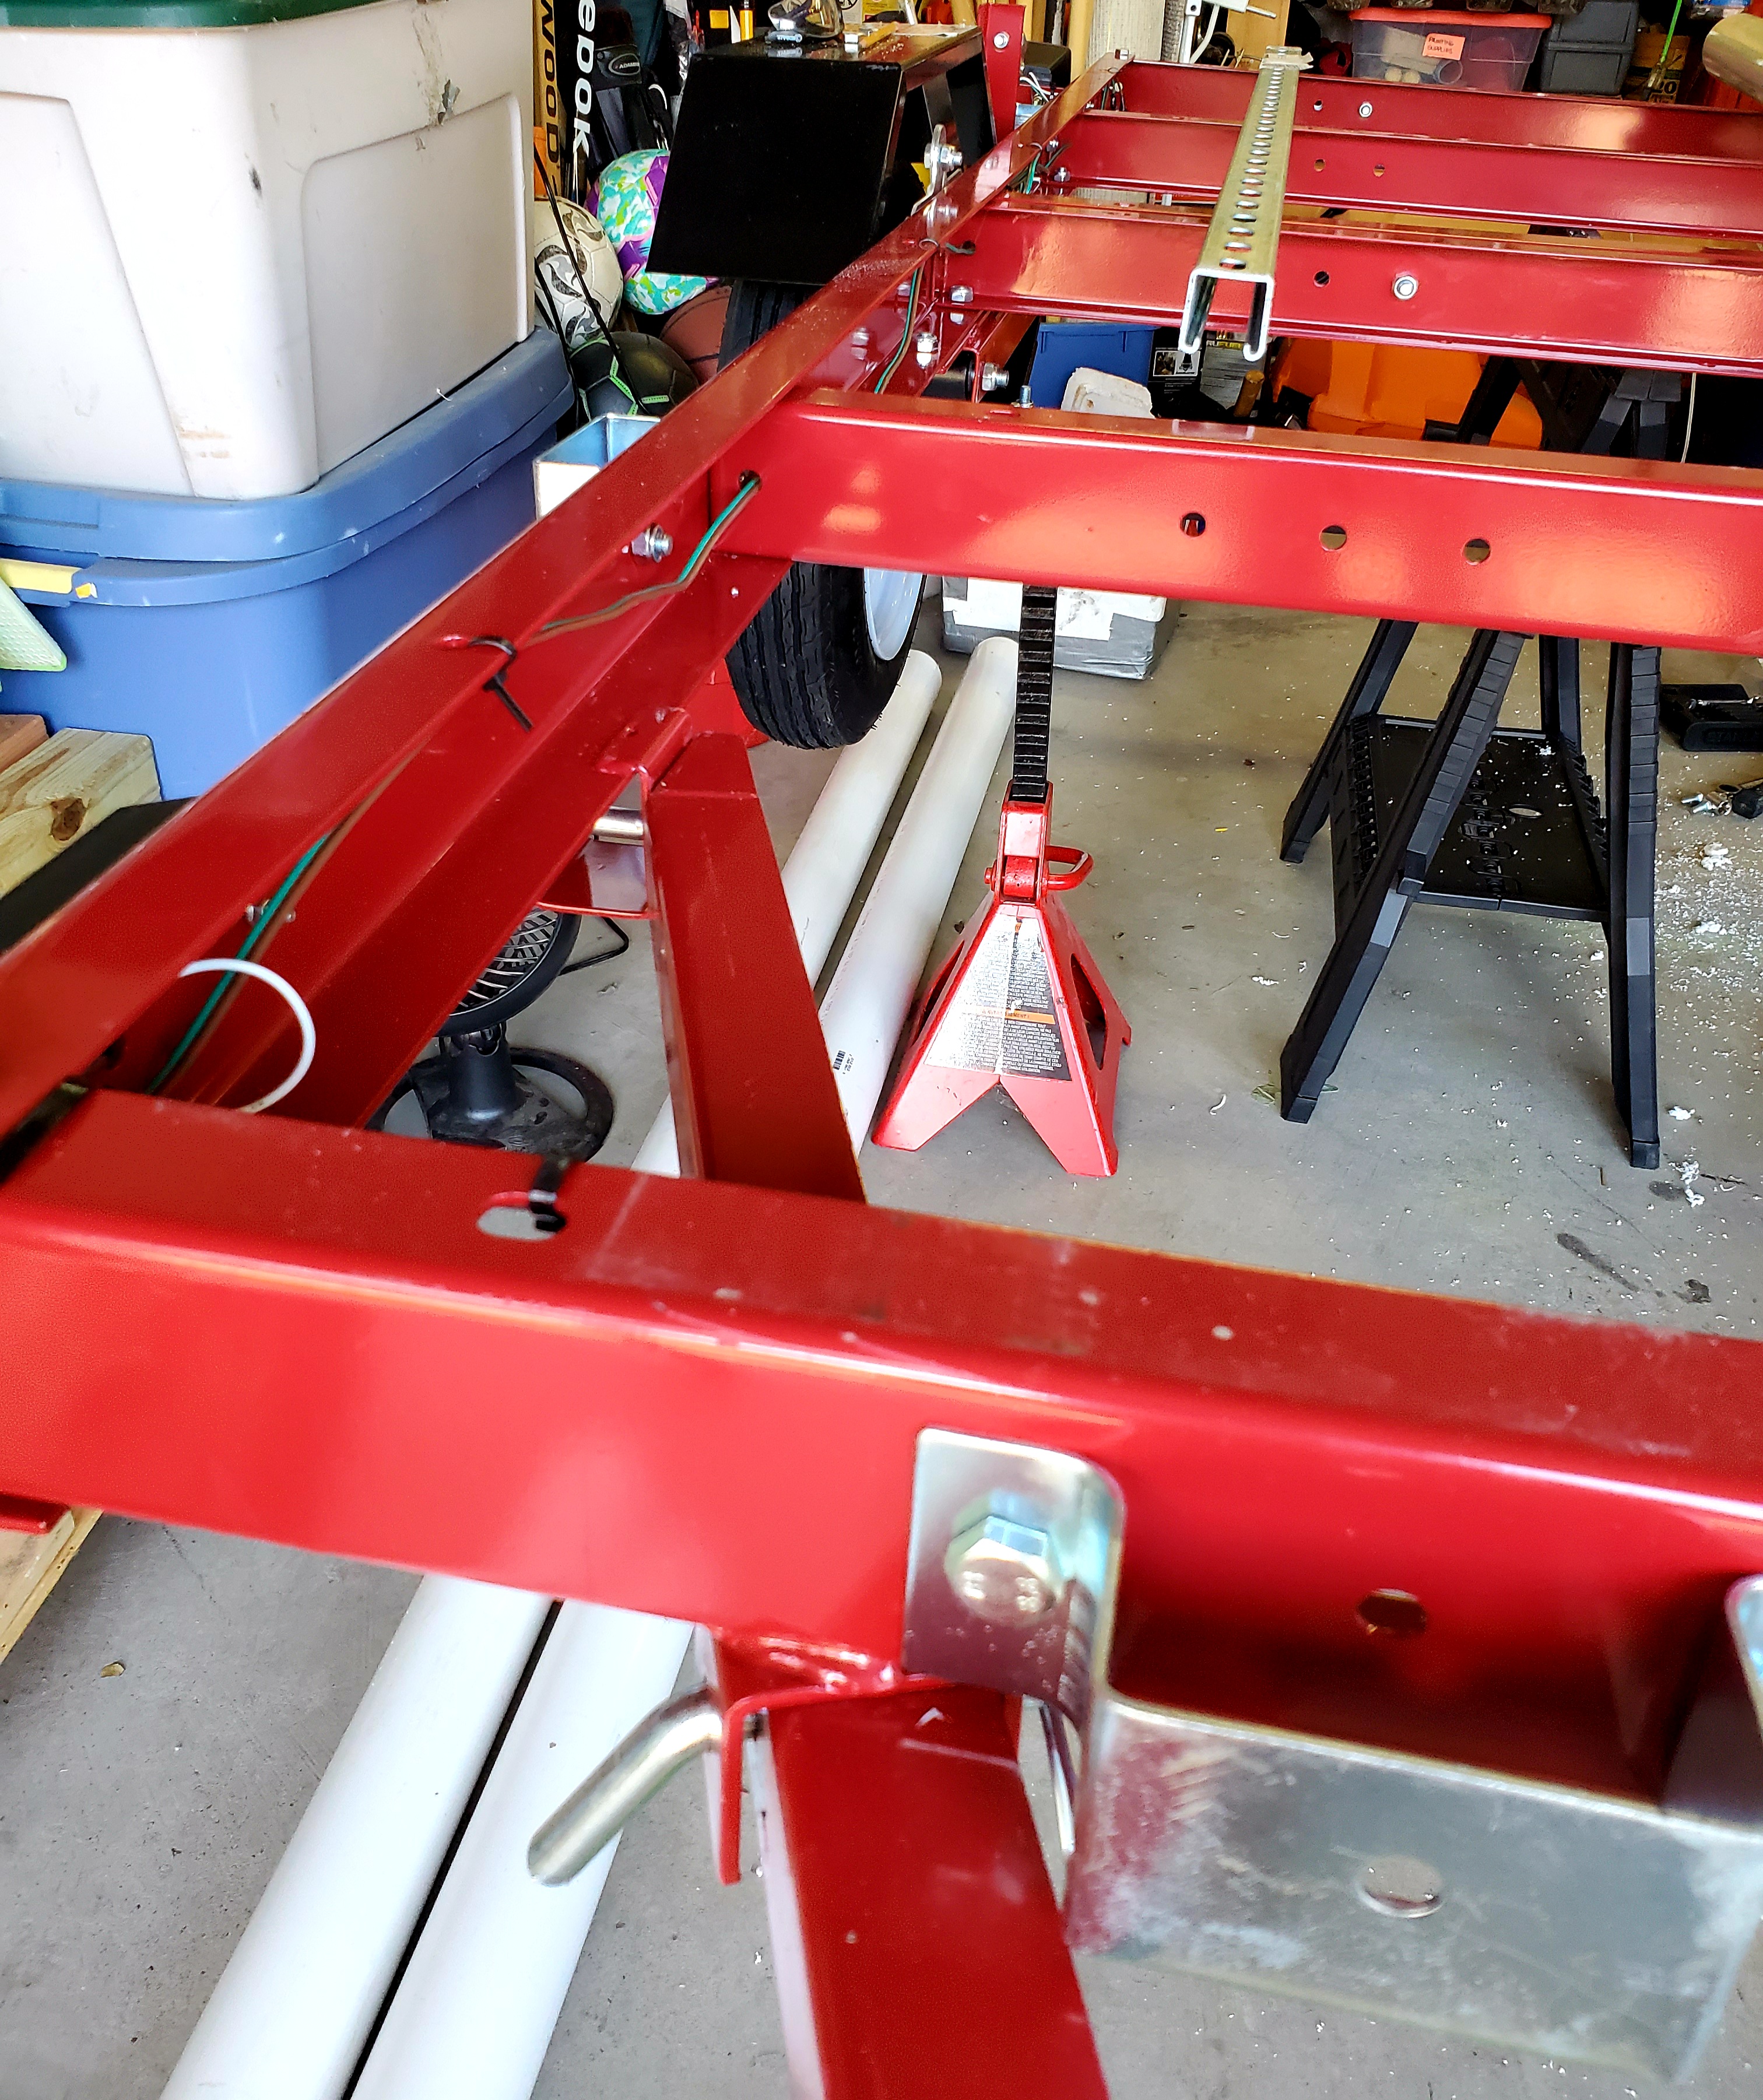
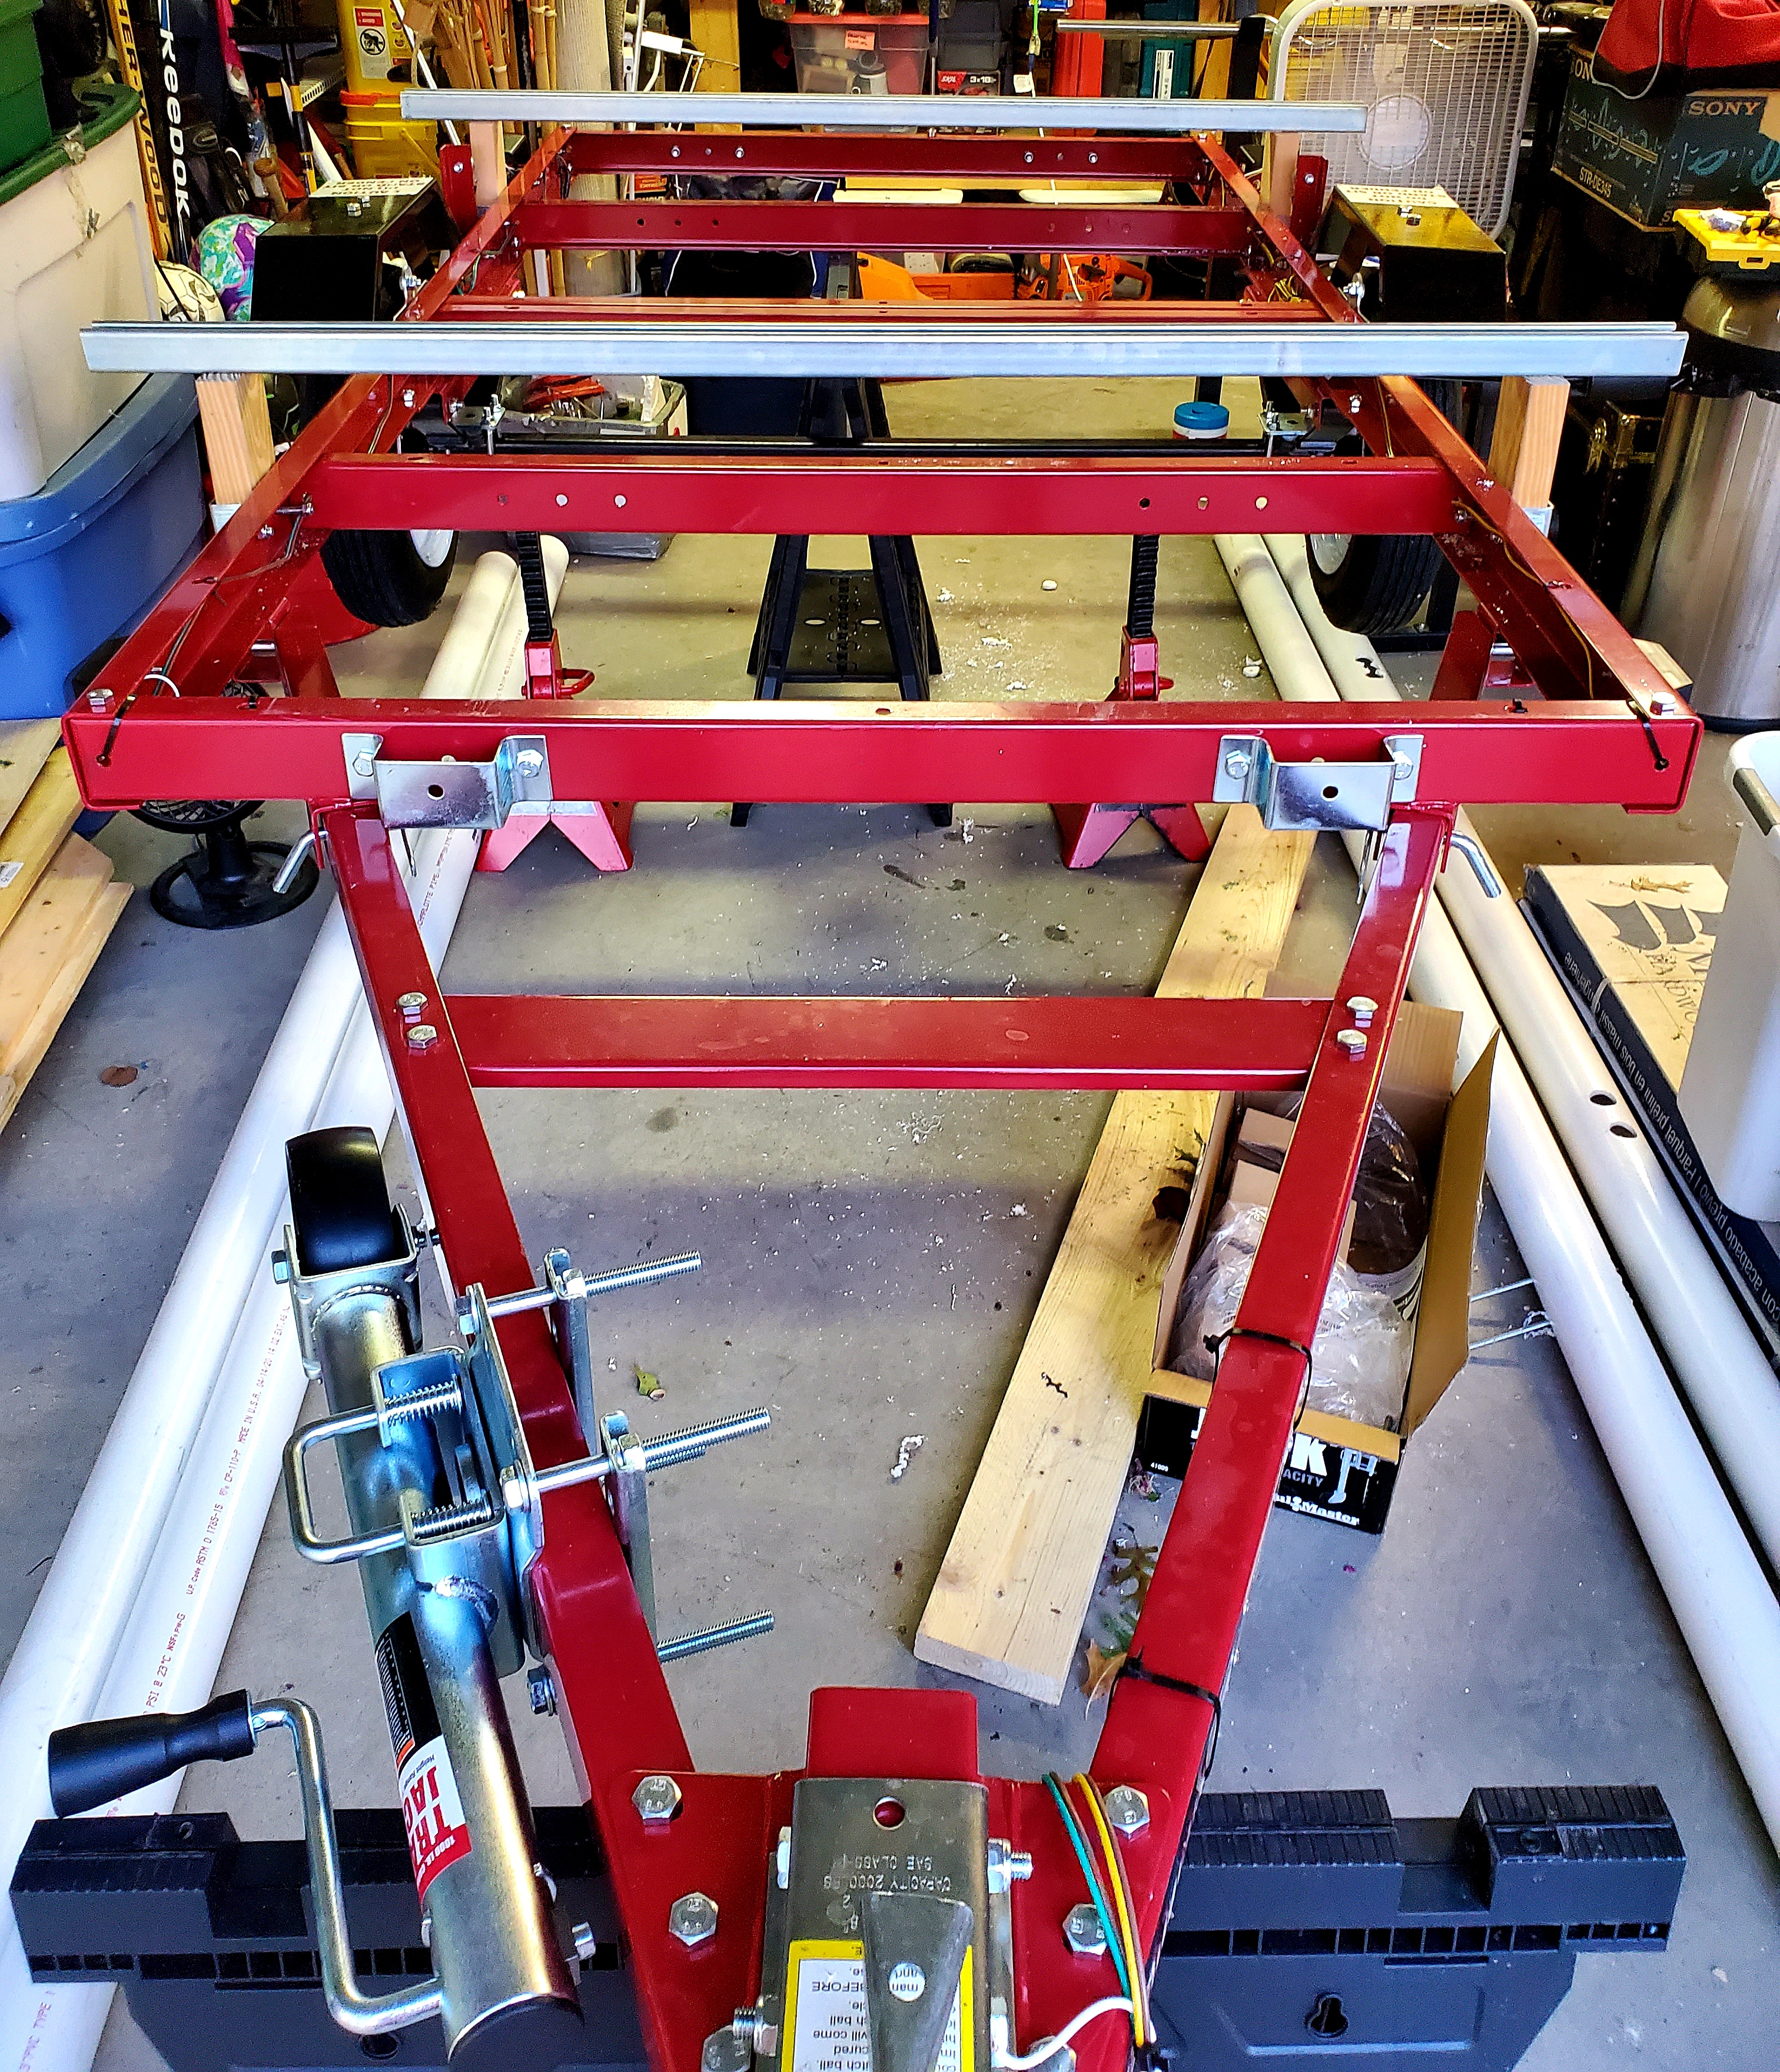
First things first - you're gonna need a trailer - we chose to go with an affordable but sturdy Super Duty Folding Trailer from Harbor Freight; with a 1,720 lb. weight capacity, it's more than sufficient for two kayaks.
* Keep in mind that it will take the better part of a day to build it - and make sure you follow the directions closely! *
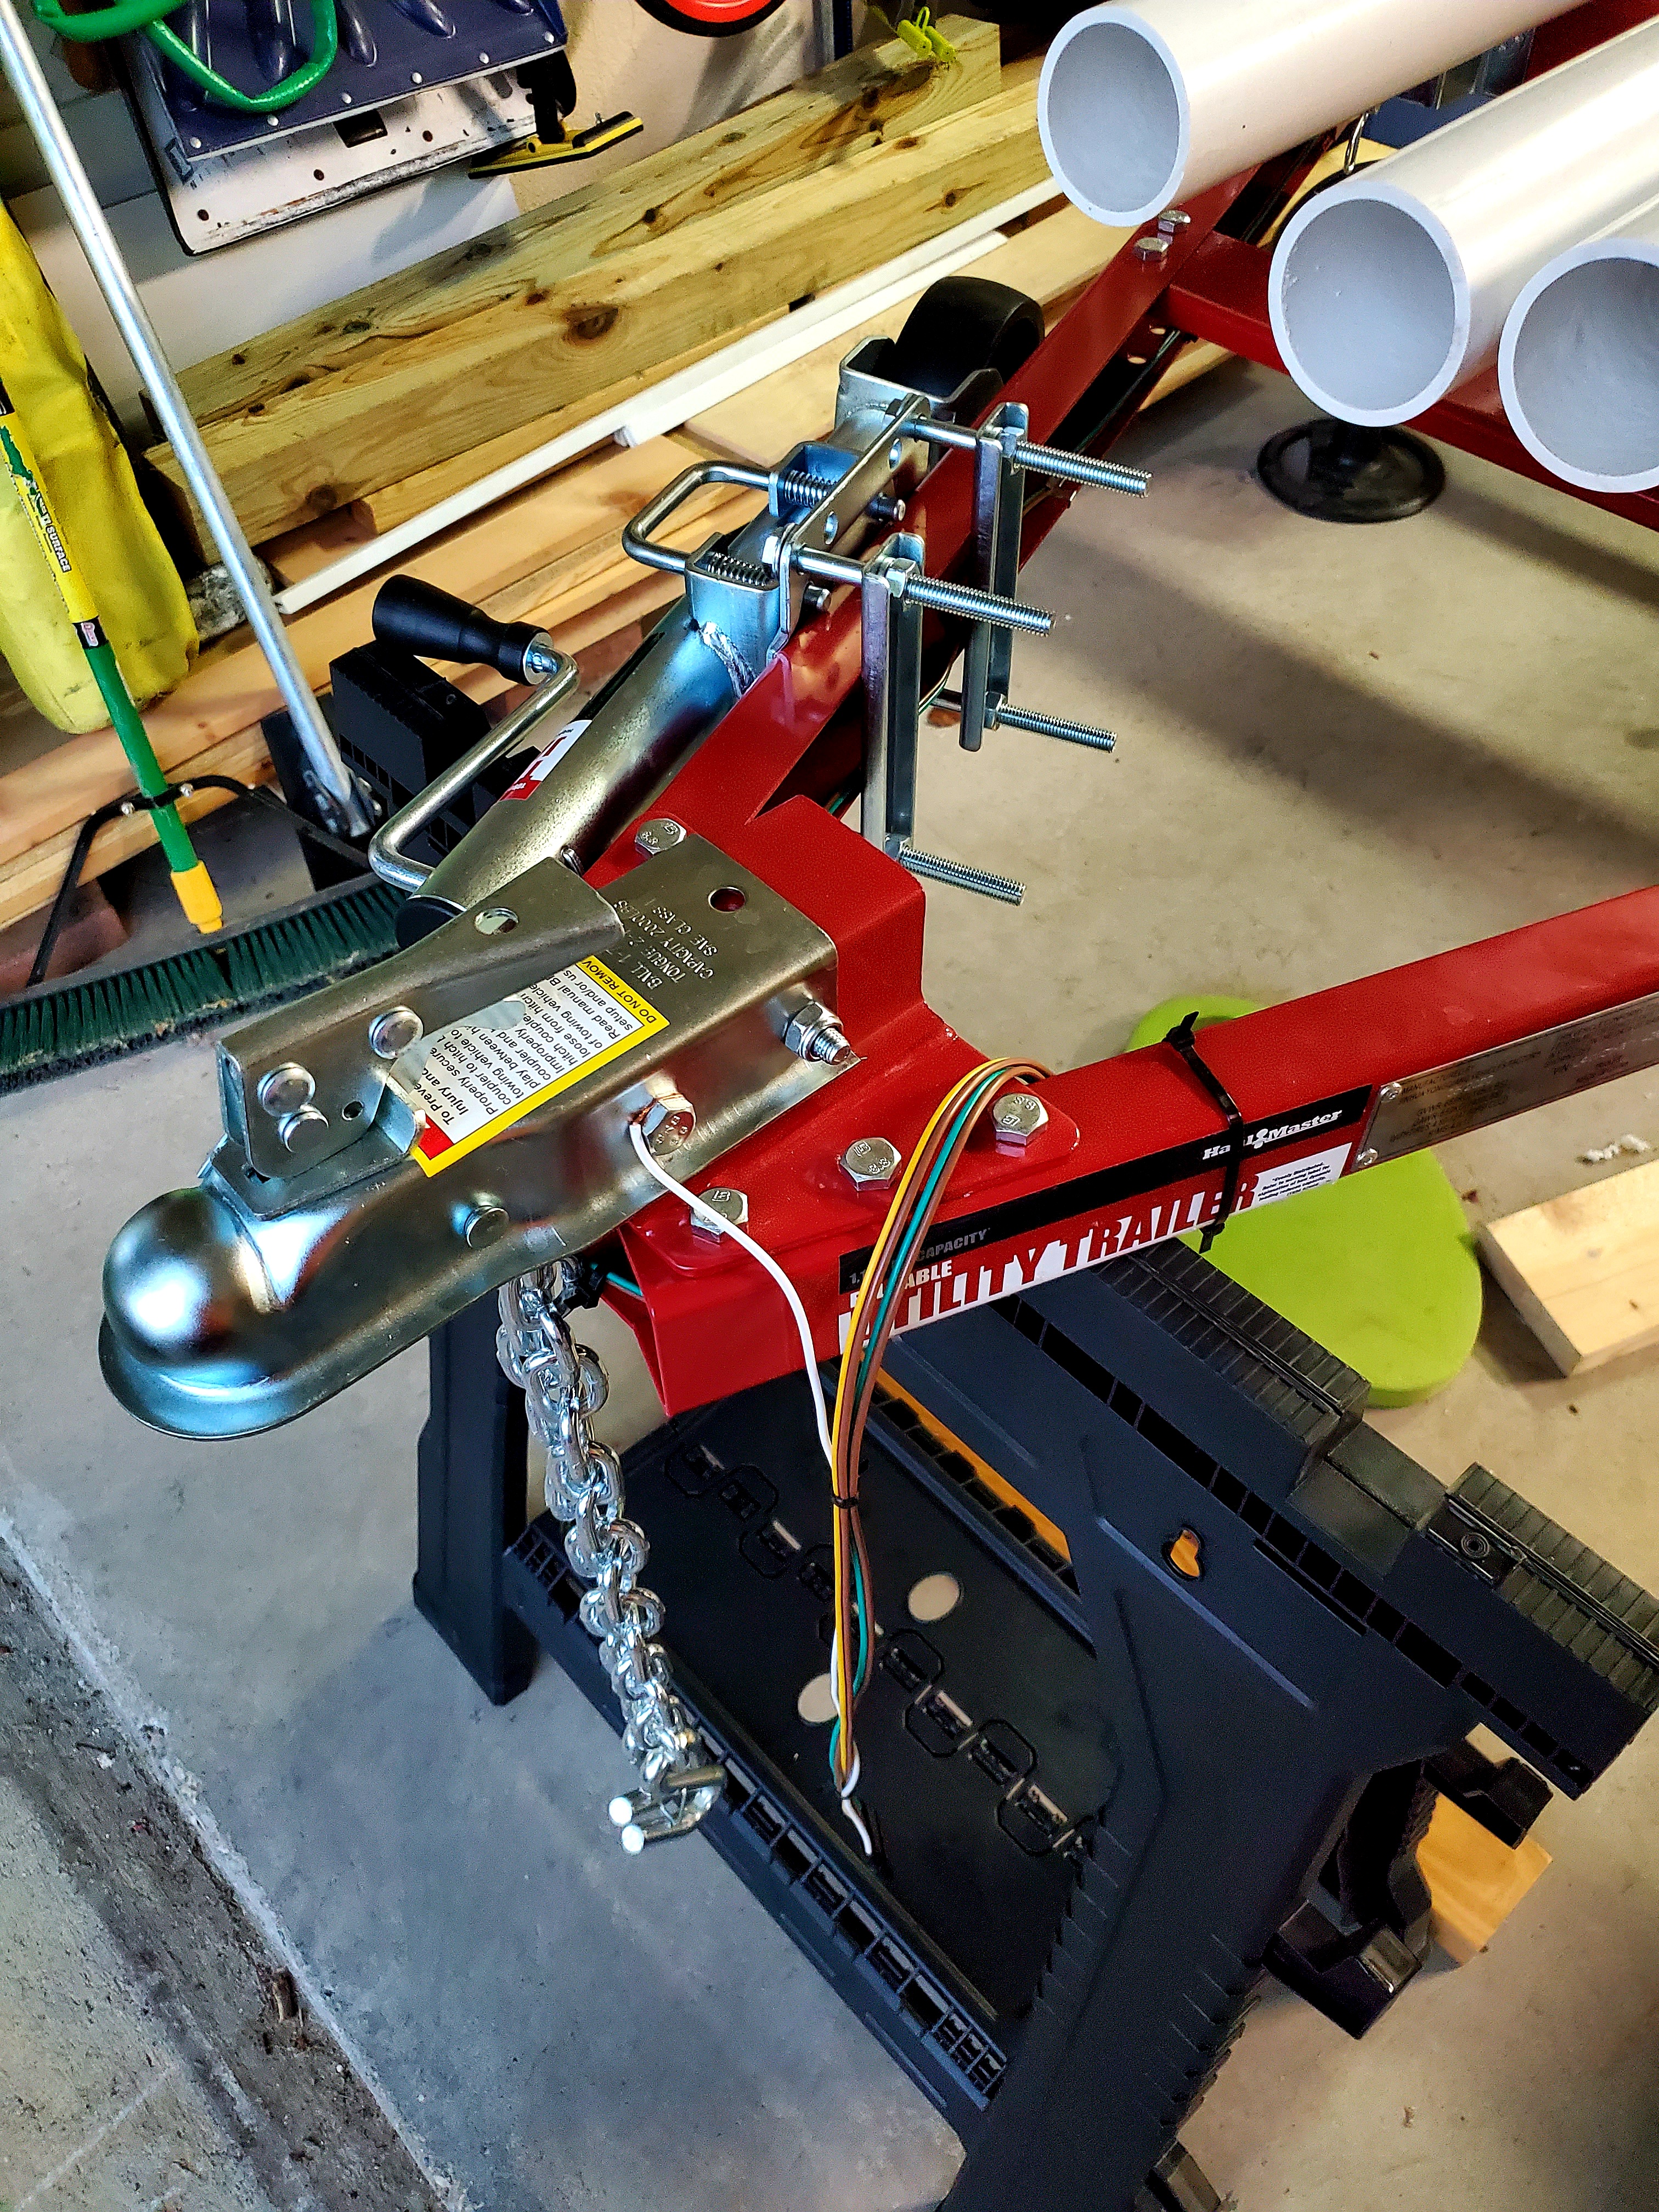
While you're there, don't forget to pick up a swing-back bolt-on trailer jack to make it quick and easy to hook up to your hitch.
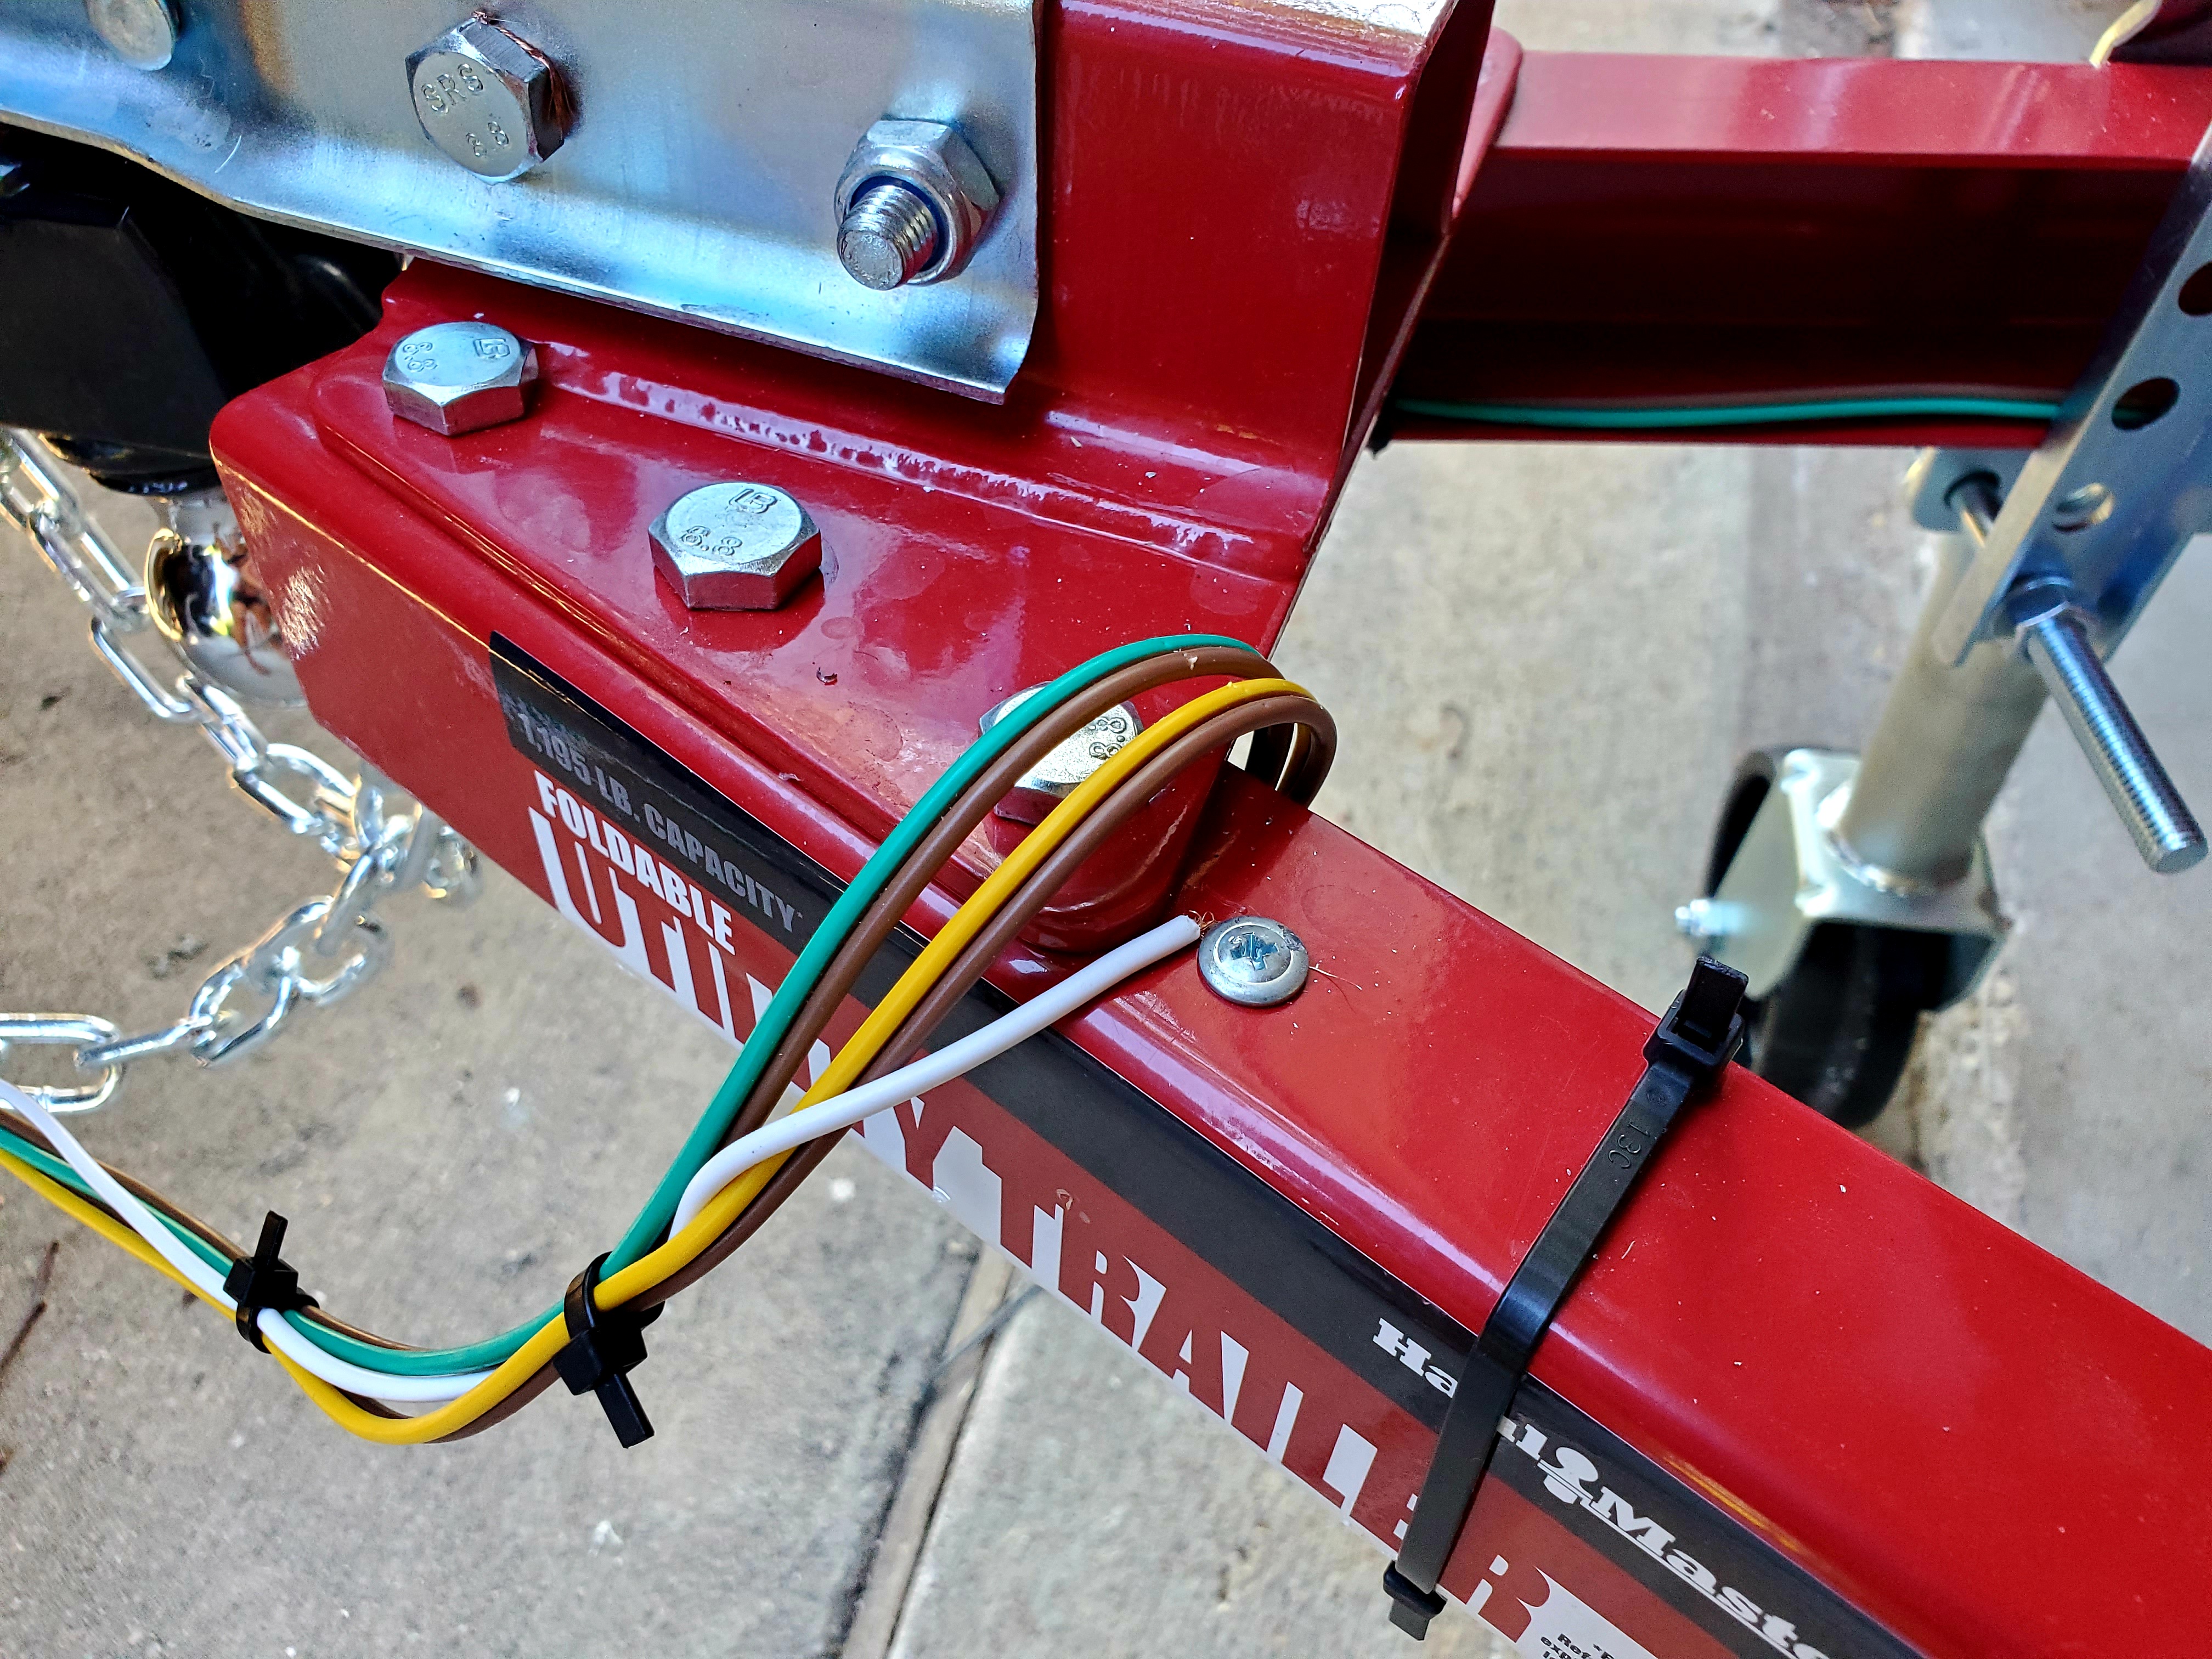
Before you build out the top of the trailer, follow the instructions on how to wire the lighting on the trailer. Keep in mind, it's a good idea to keep your wiring secure and clean with zip-ties.
And don't forget to ground your wiring - which you can do by connecting the wiring straight to the frame with a little self-tapping screw.
Next, you're going to need to swing by your local hardware store for:
One box of thick, heavy duty screws (to attach struts to wooden stakes)
*Helpful tip - when you're building out the base of the trailer, raising it up with saw horses and jacks will save your back!
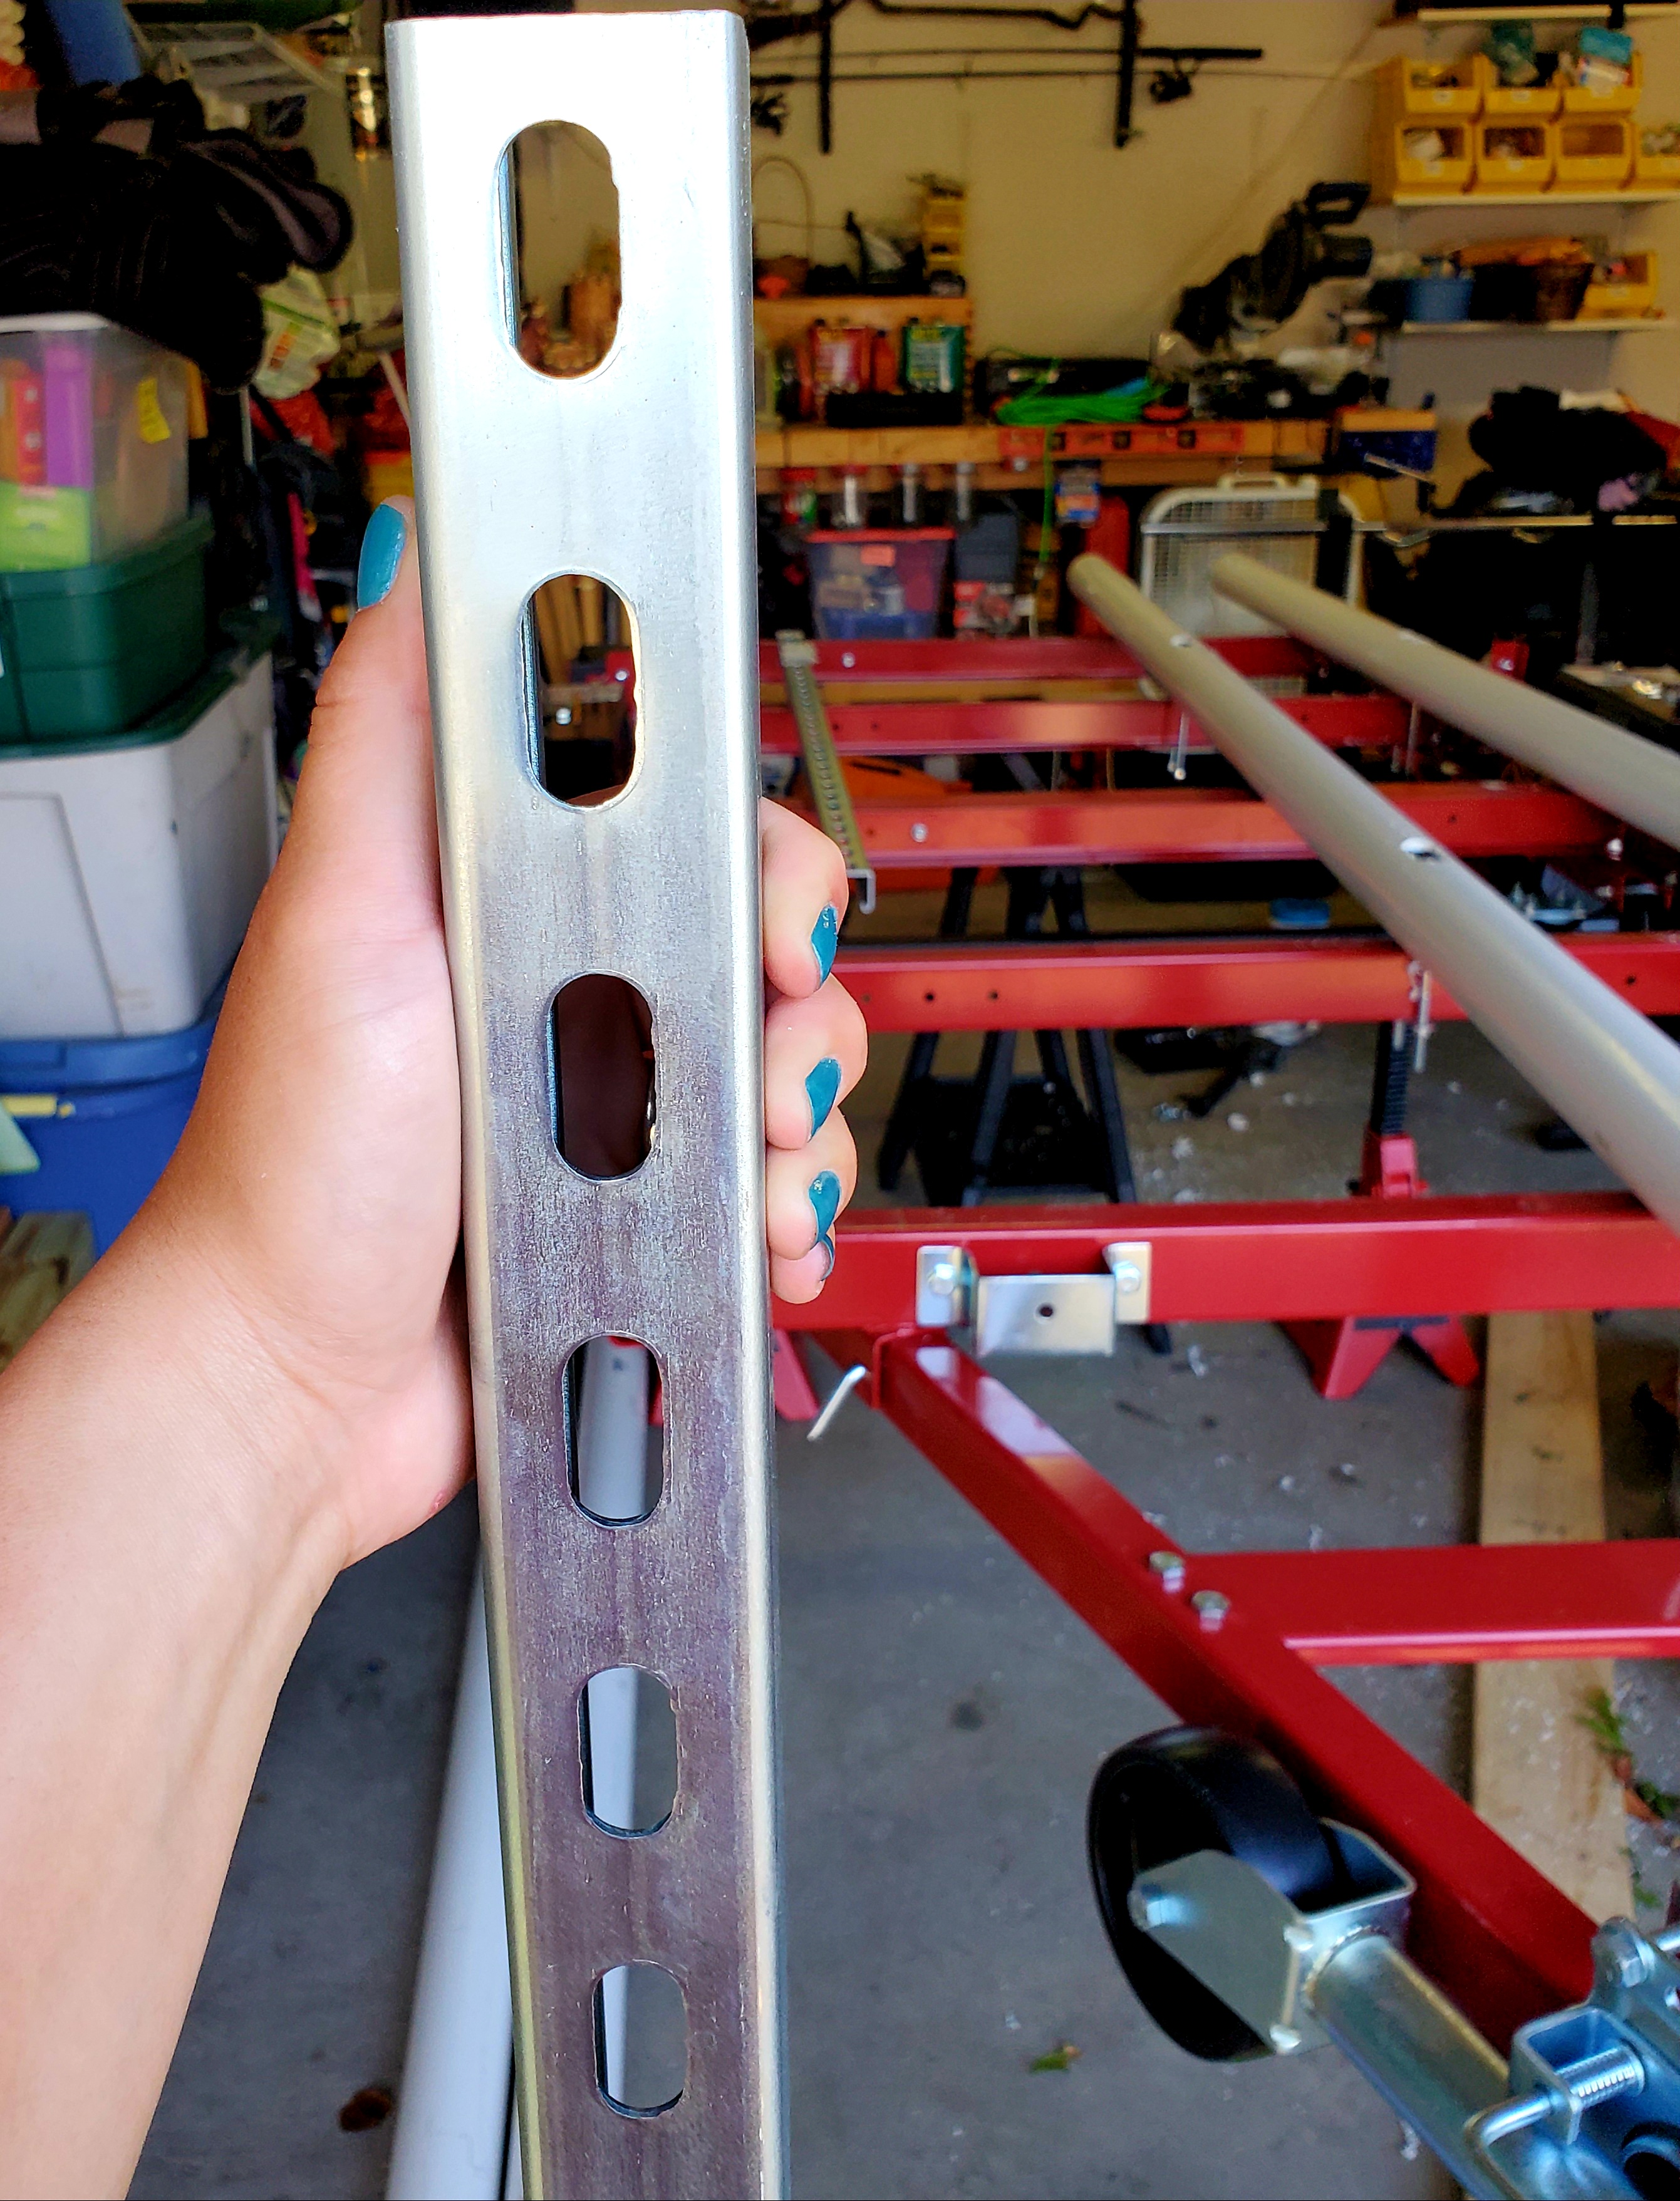
Whichever trailer you choose to go with, measure the length that you'll need for your stakes (the upright pieces of wood around the outside of the frame) by making sure that the top of the stake is *higher* than the top of your fenders. The tops of those stakes is where you'll attach your struts!
Once you cut your lumber, attach it to the trailer with 3/8" x 3" bolts and make sure to use a lock washer and nut to secure the end of the bolt once you pass it through the stake and the frame.
***Remember to inspect your stakes often for any signs of splitting or cracking!!***
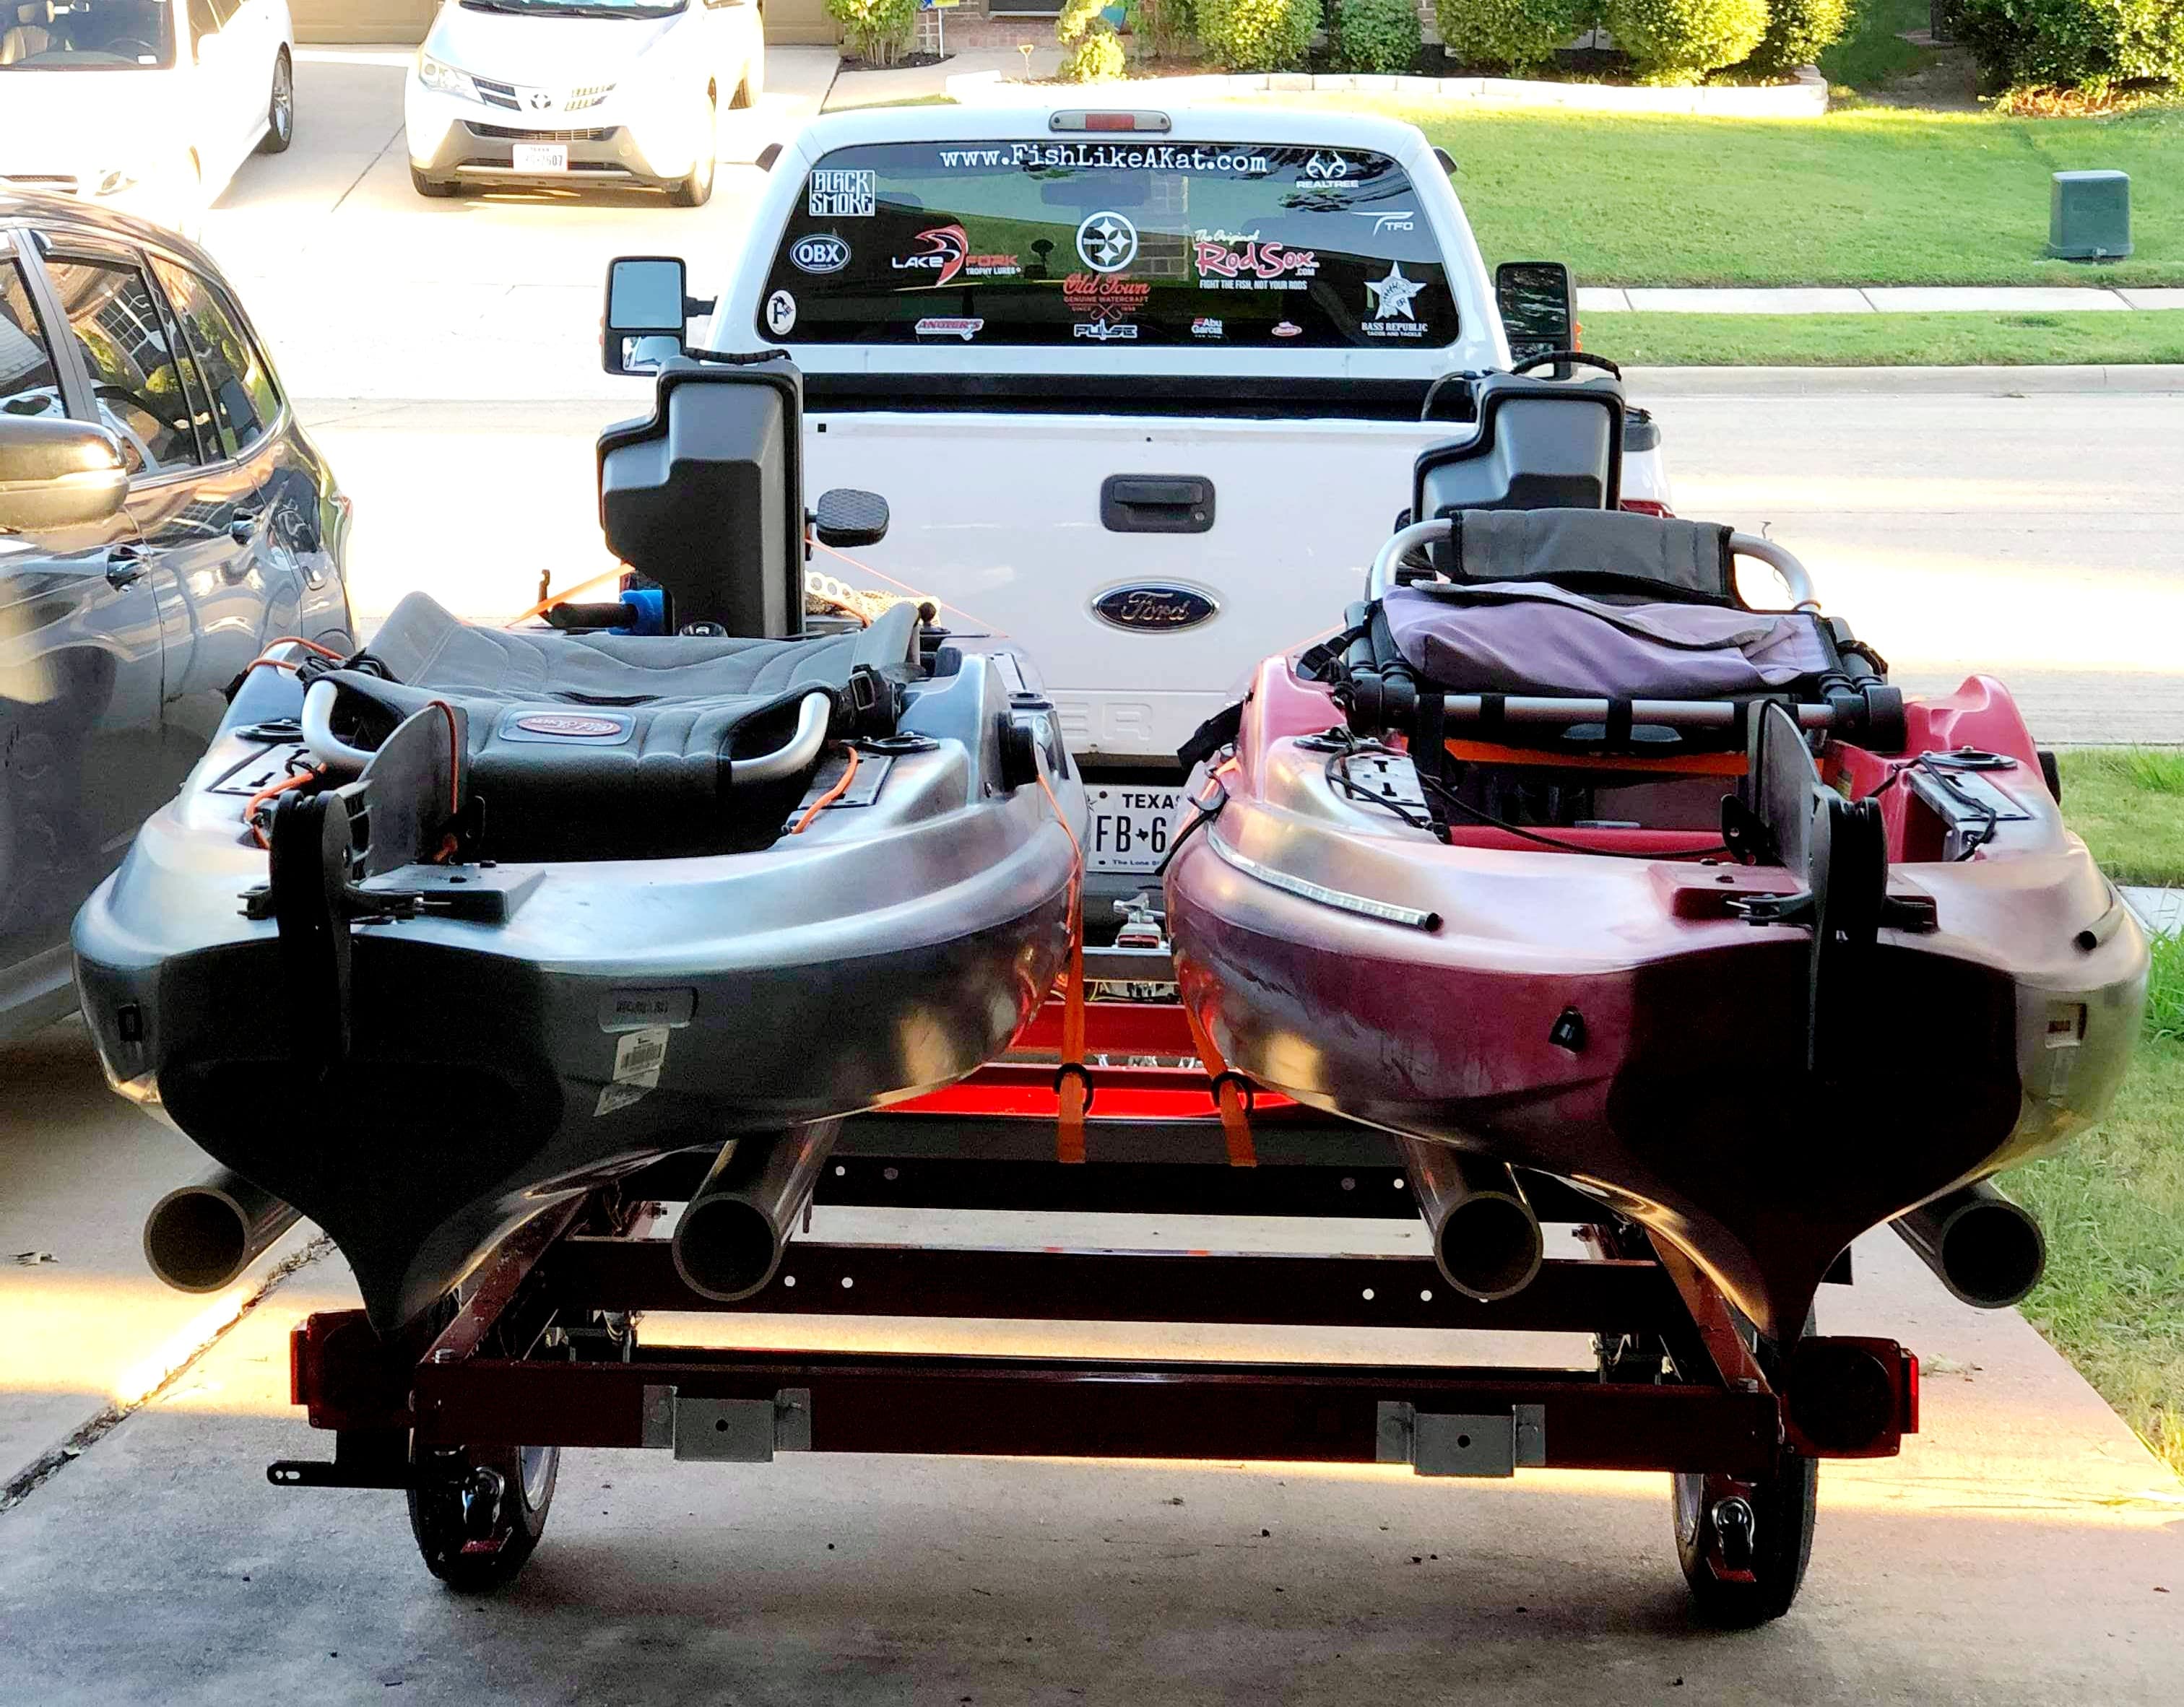
Now, if you're only mounting a single kayak, the width of the trailer should be plenty big enough on its own to fit the width of your rig; but if you're going to haul 2 kayaks side-by-side, you'll need to measure the width of your kayaks, account for a little bit of a gap between them, and cut the length on your strut accordingly.
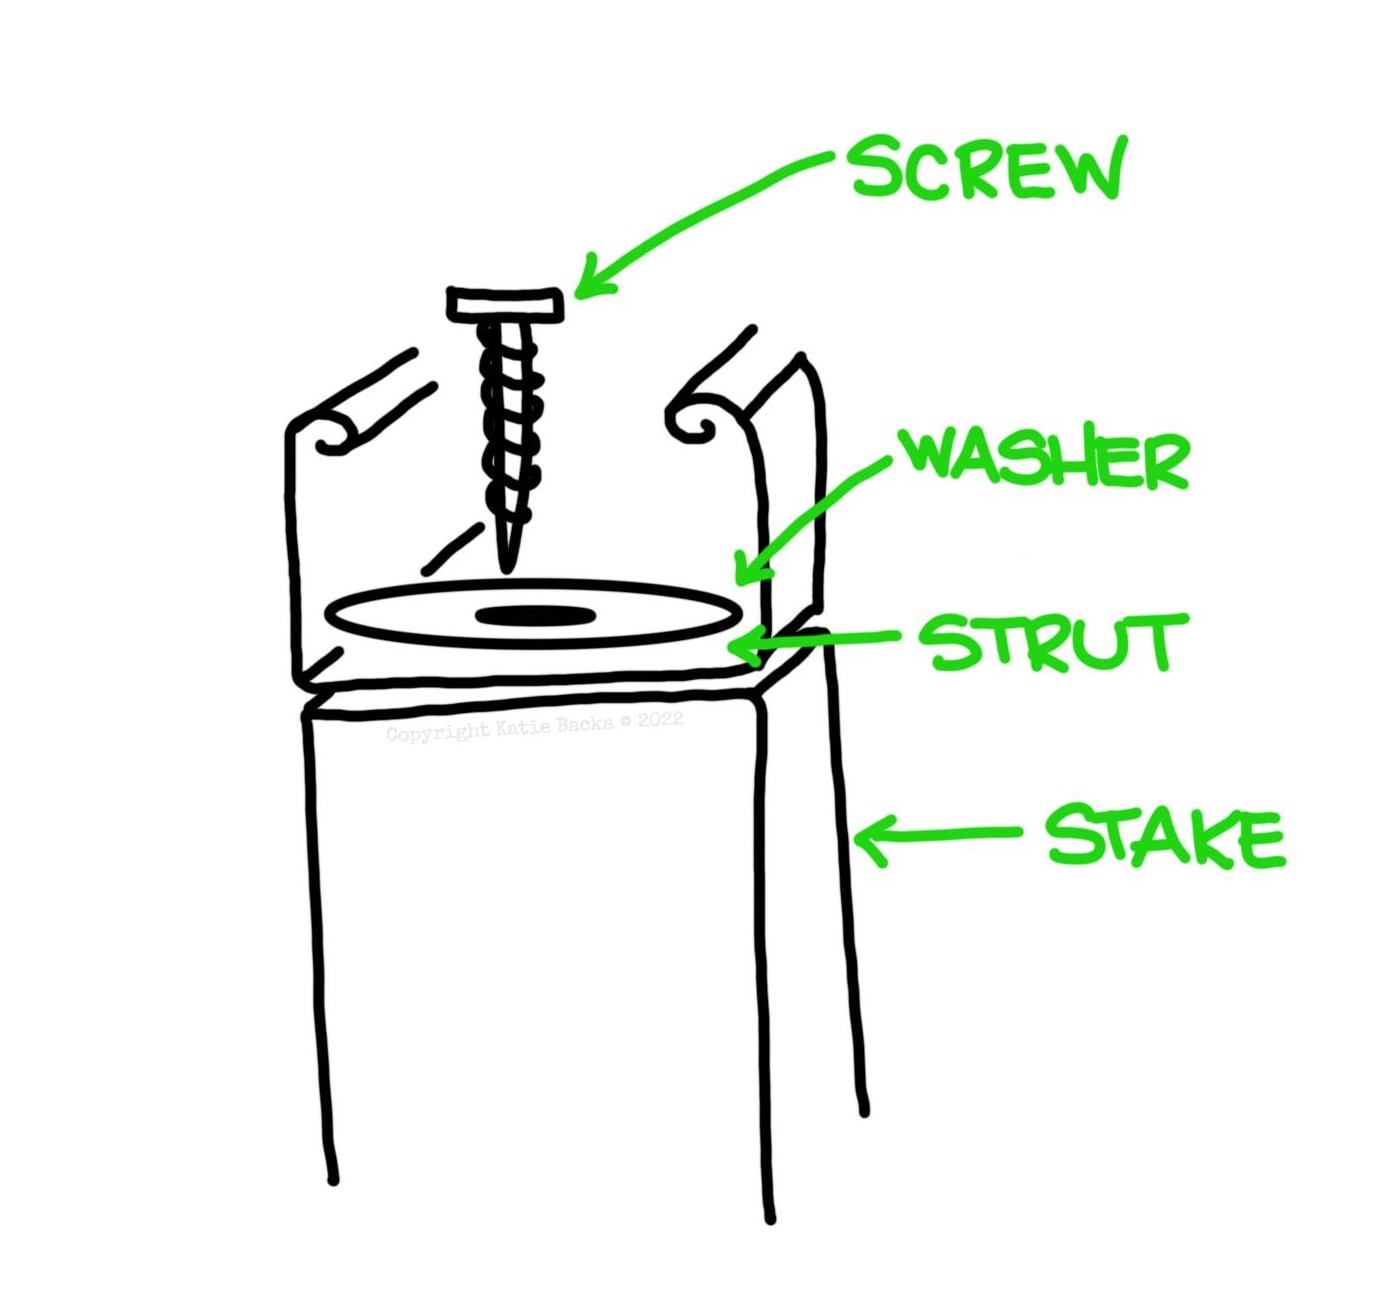
Now that you have the strut the length you need it, set them on top of the stakes, and mark where the attachment points will be - then use a drill to make pilot holes *smaller* than the size of the heavy-duty screws you'll use to attach the strut to the stake - which should help keep the wood from splitting when you screw the struts down.
To keep the screw from separating from the strut, be sure to use a washer on top of the strut before screwing it down into the stake.
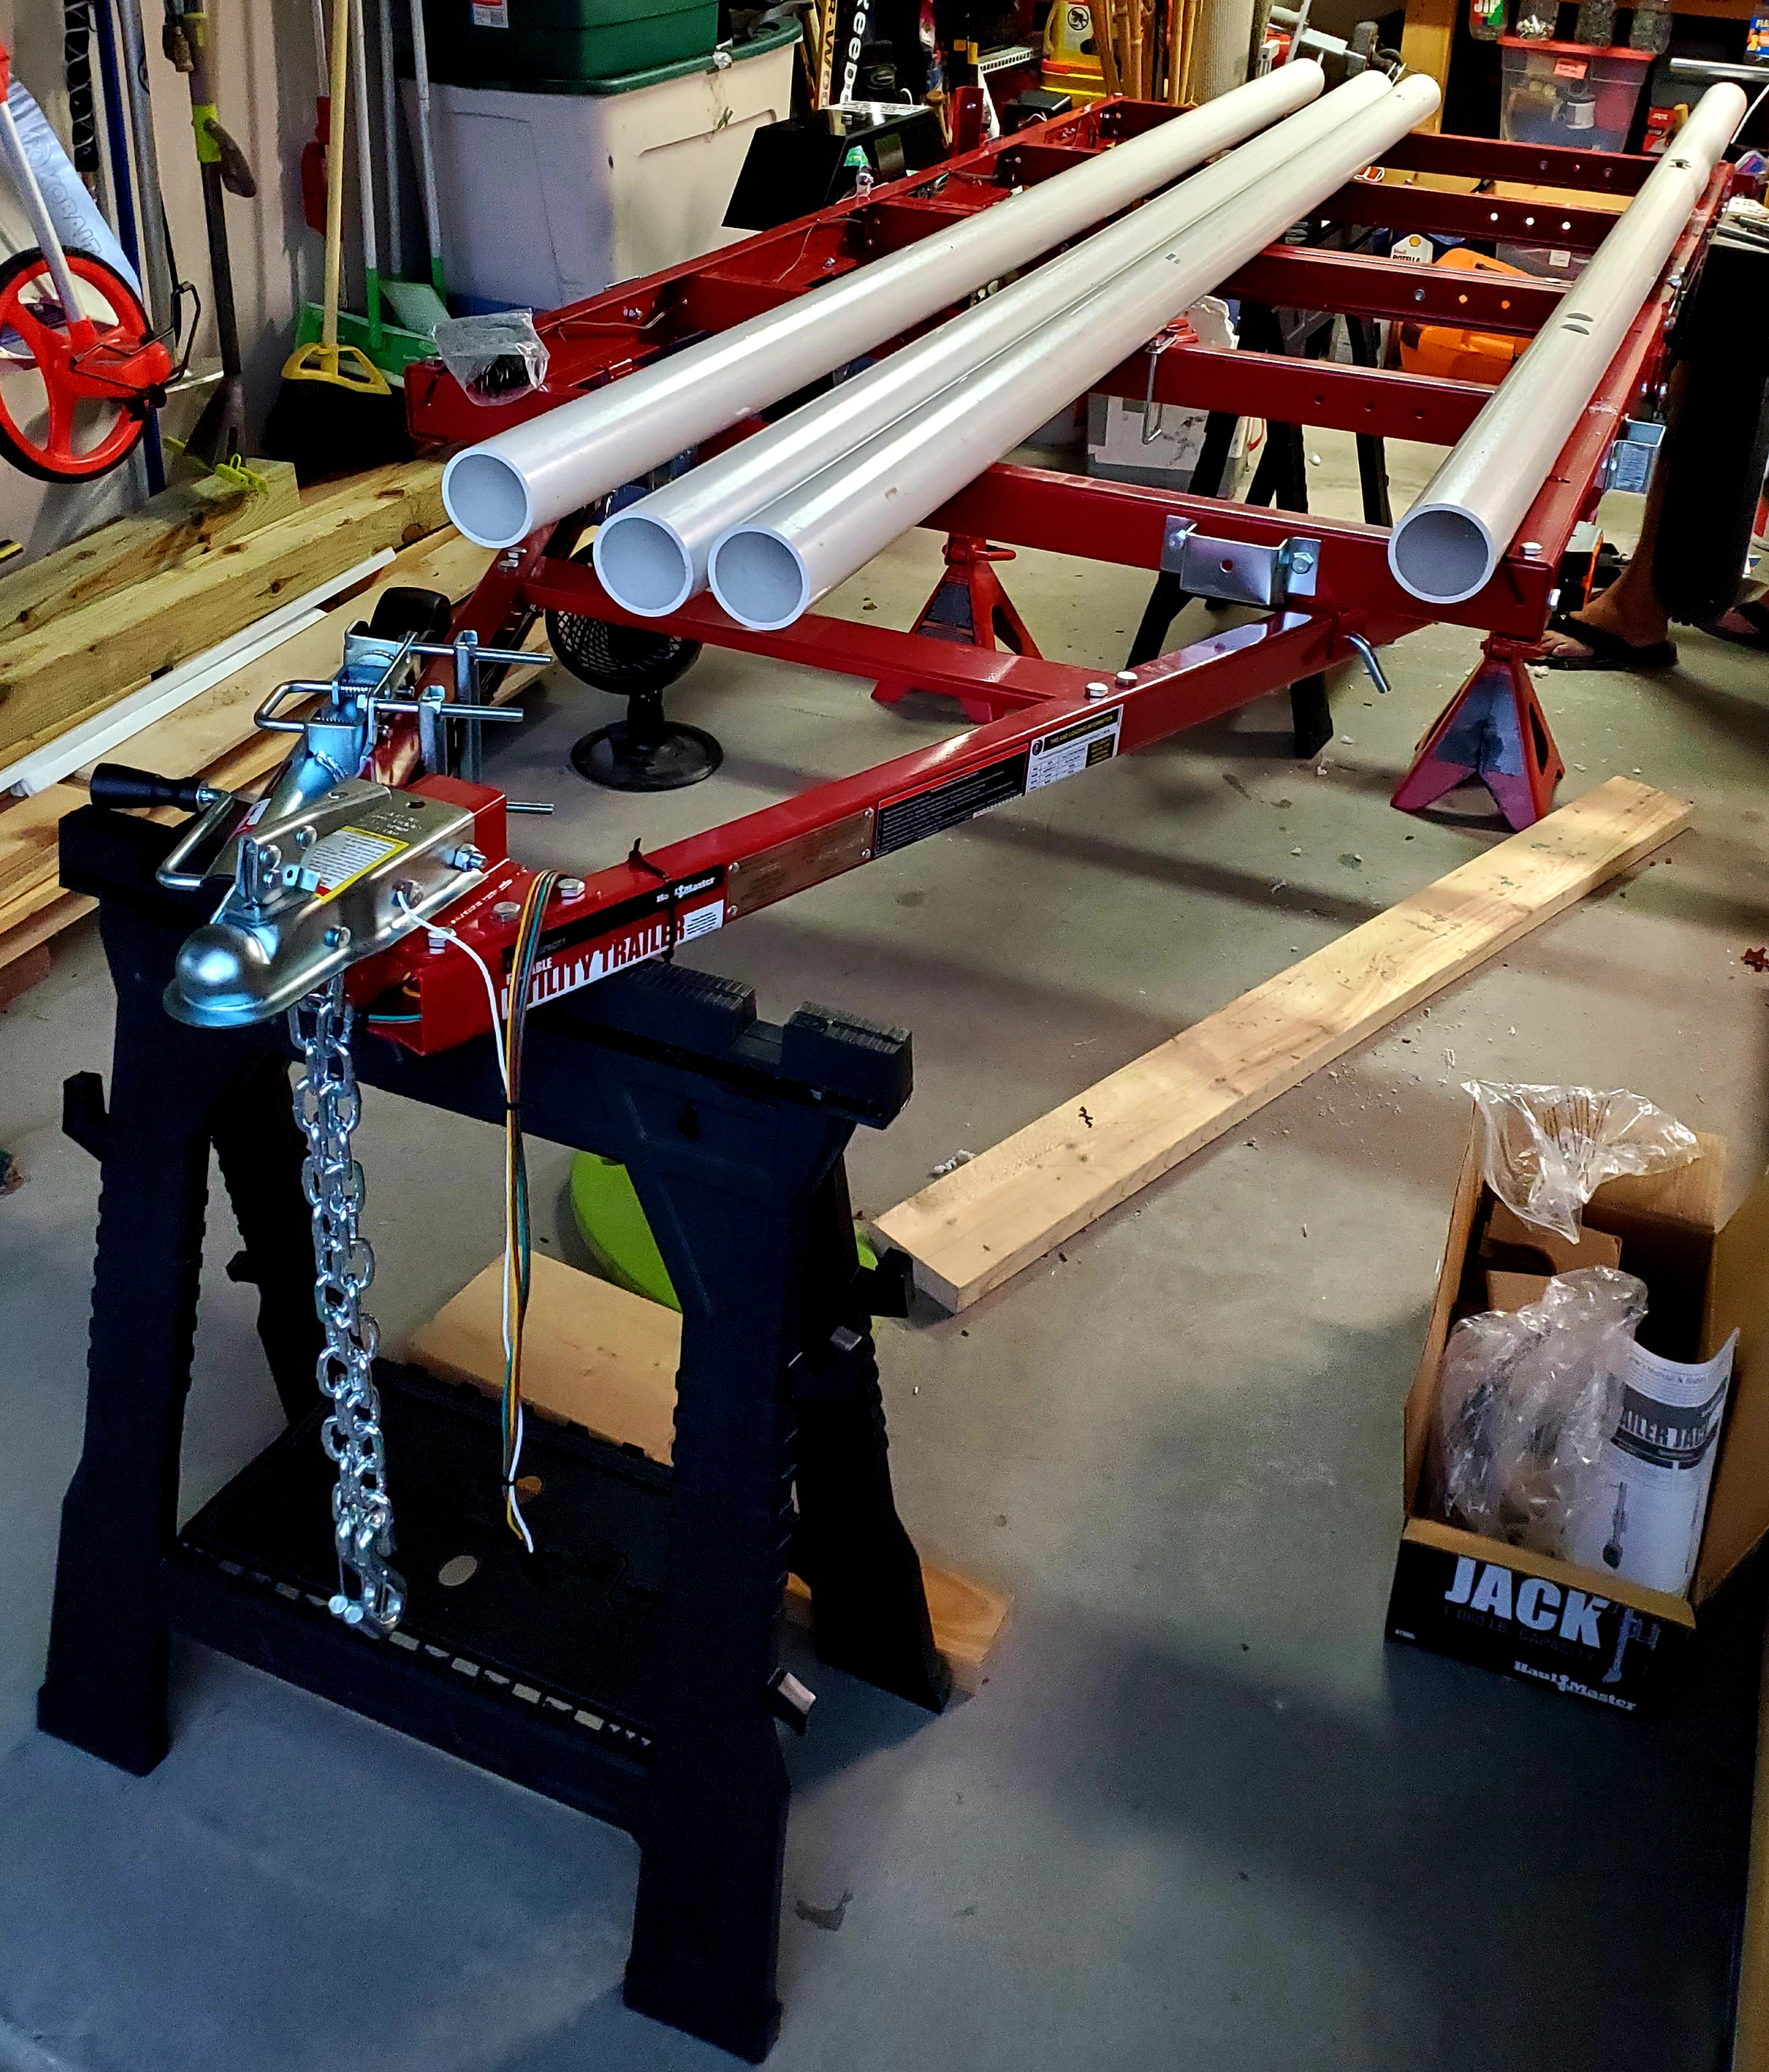
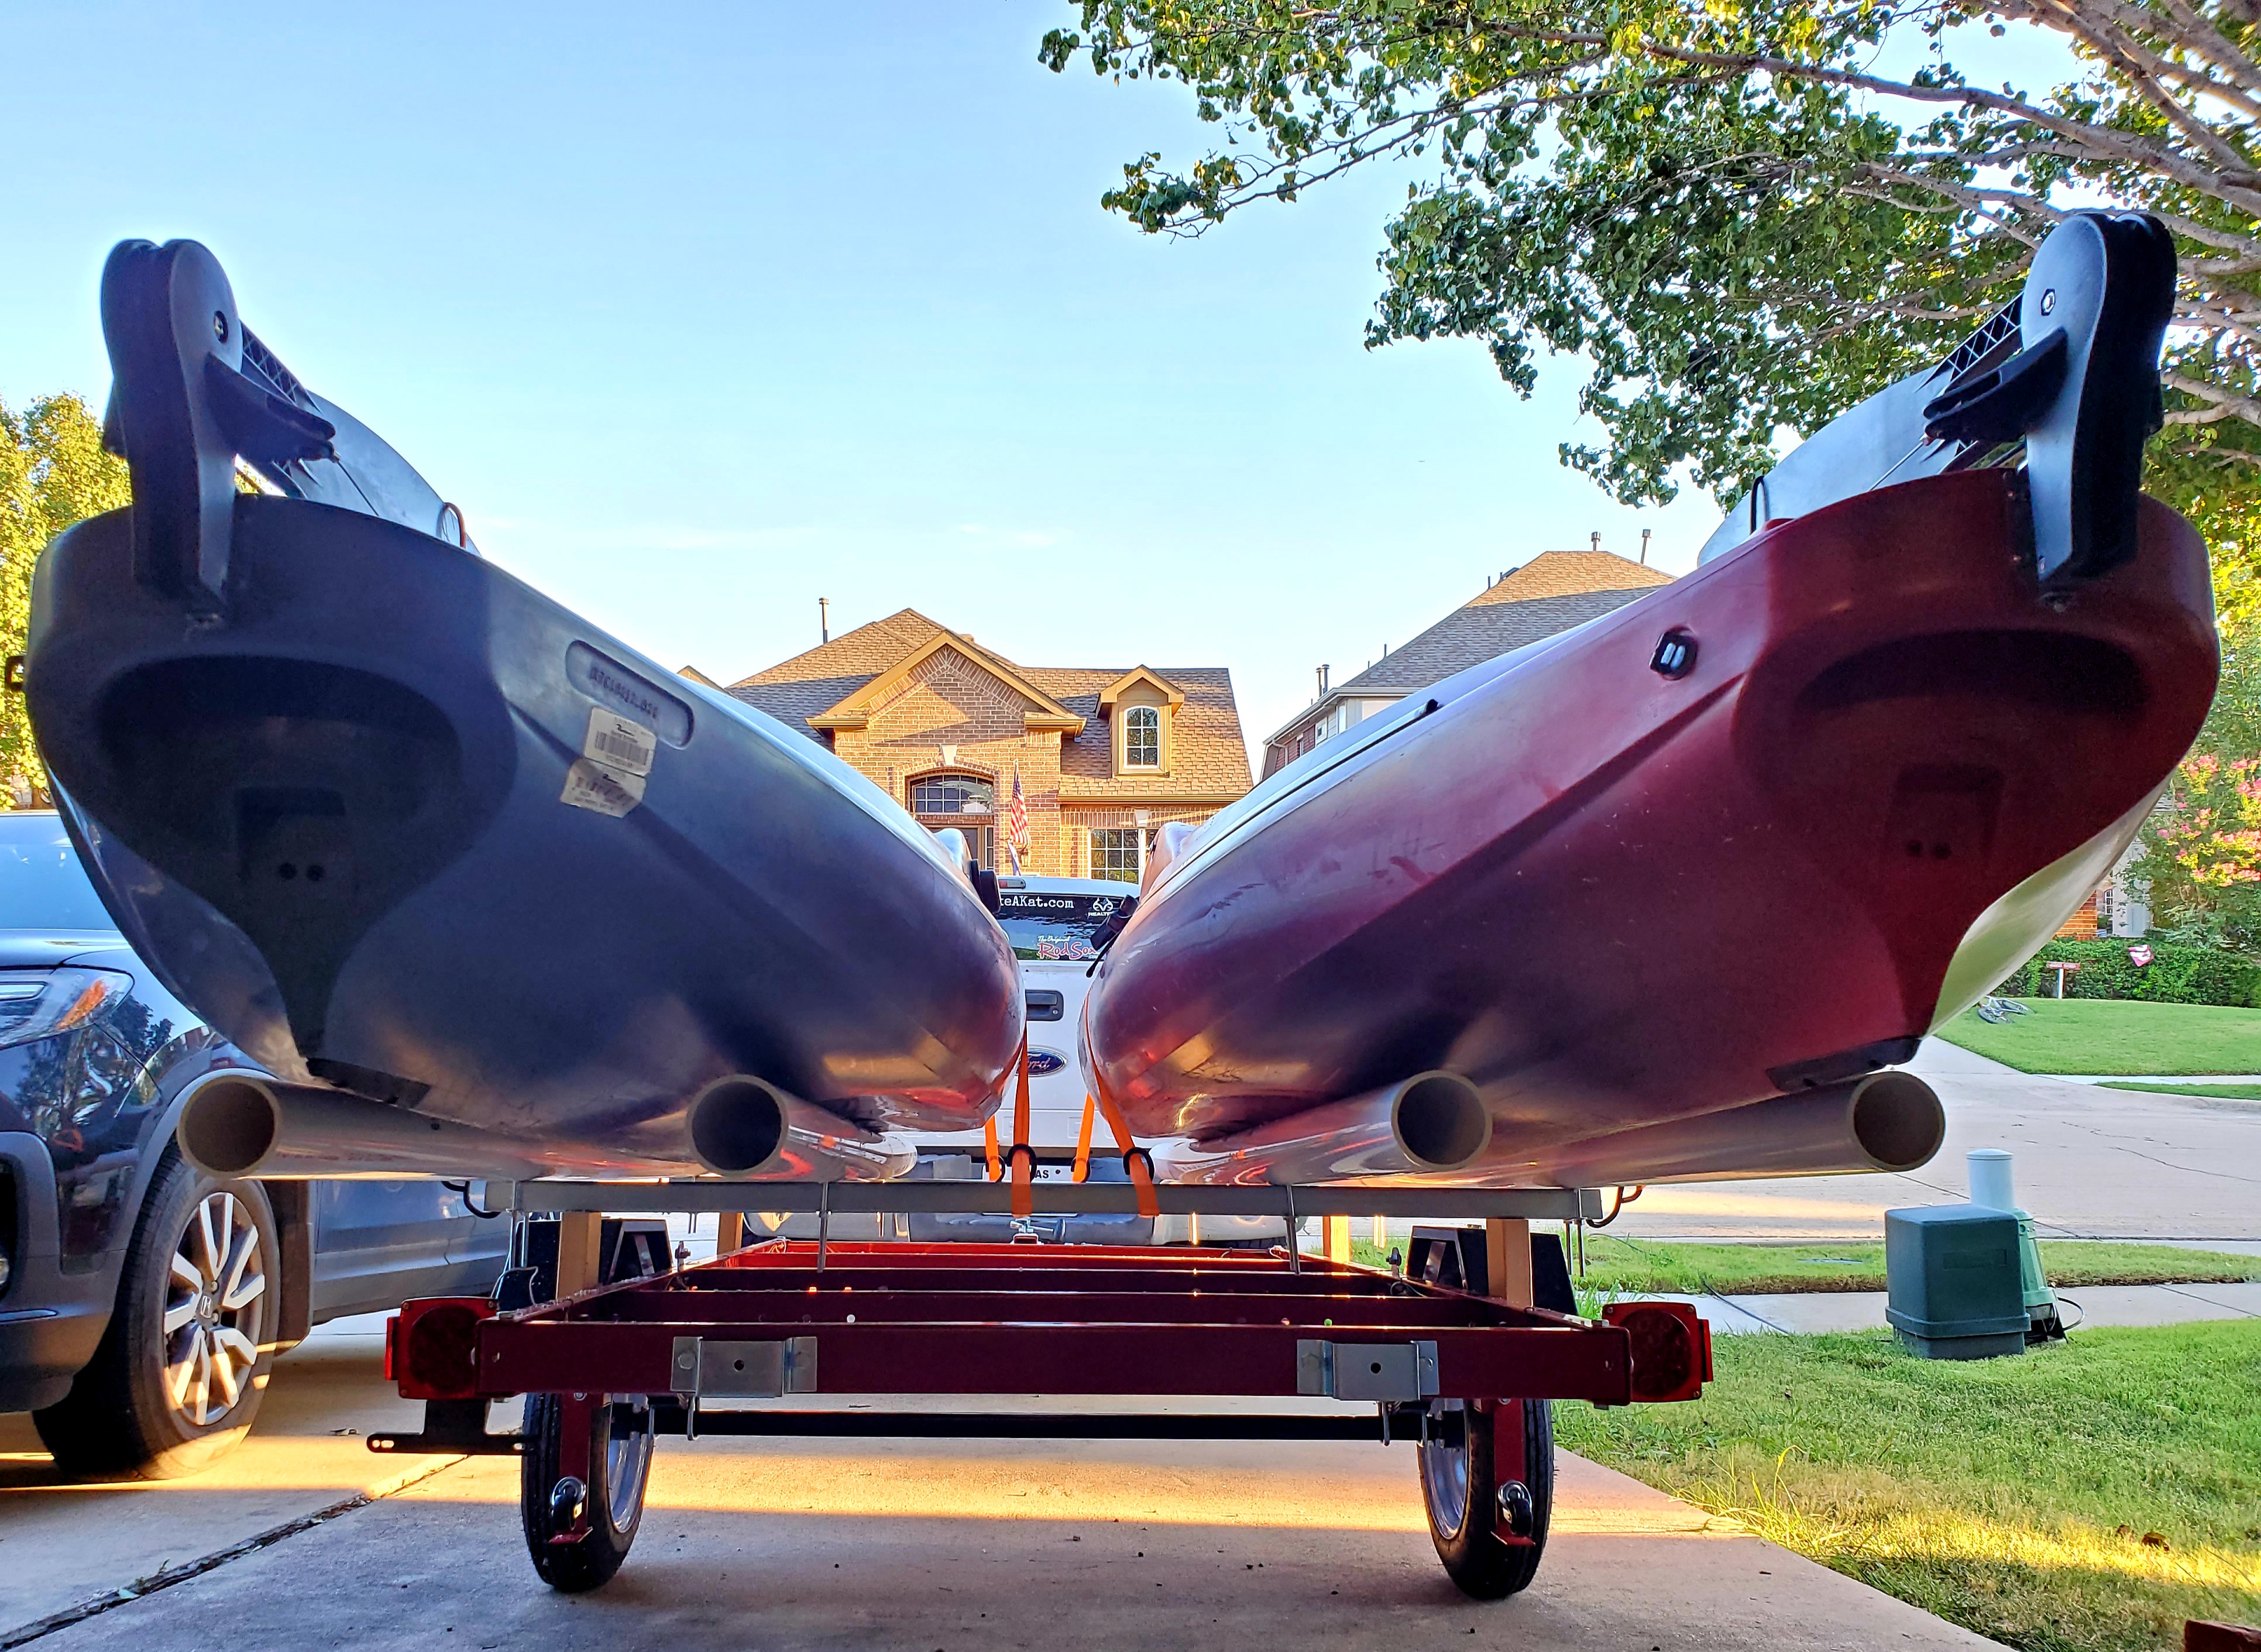
After you get your struts secured to their stakes, it's time to figure out where you'll need to place your PVC bunks to get your kayak to sit flat on the trailer without falling off to one side.
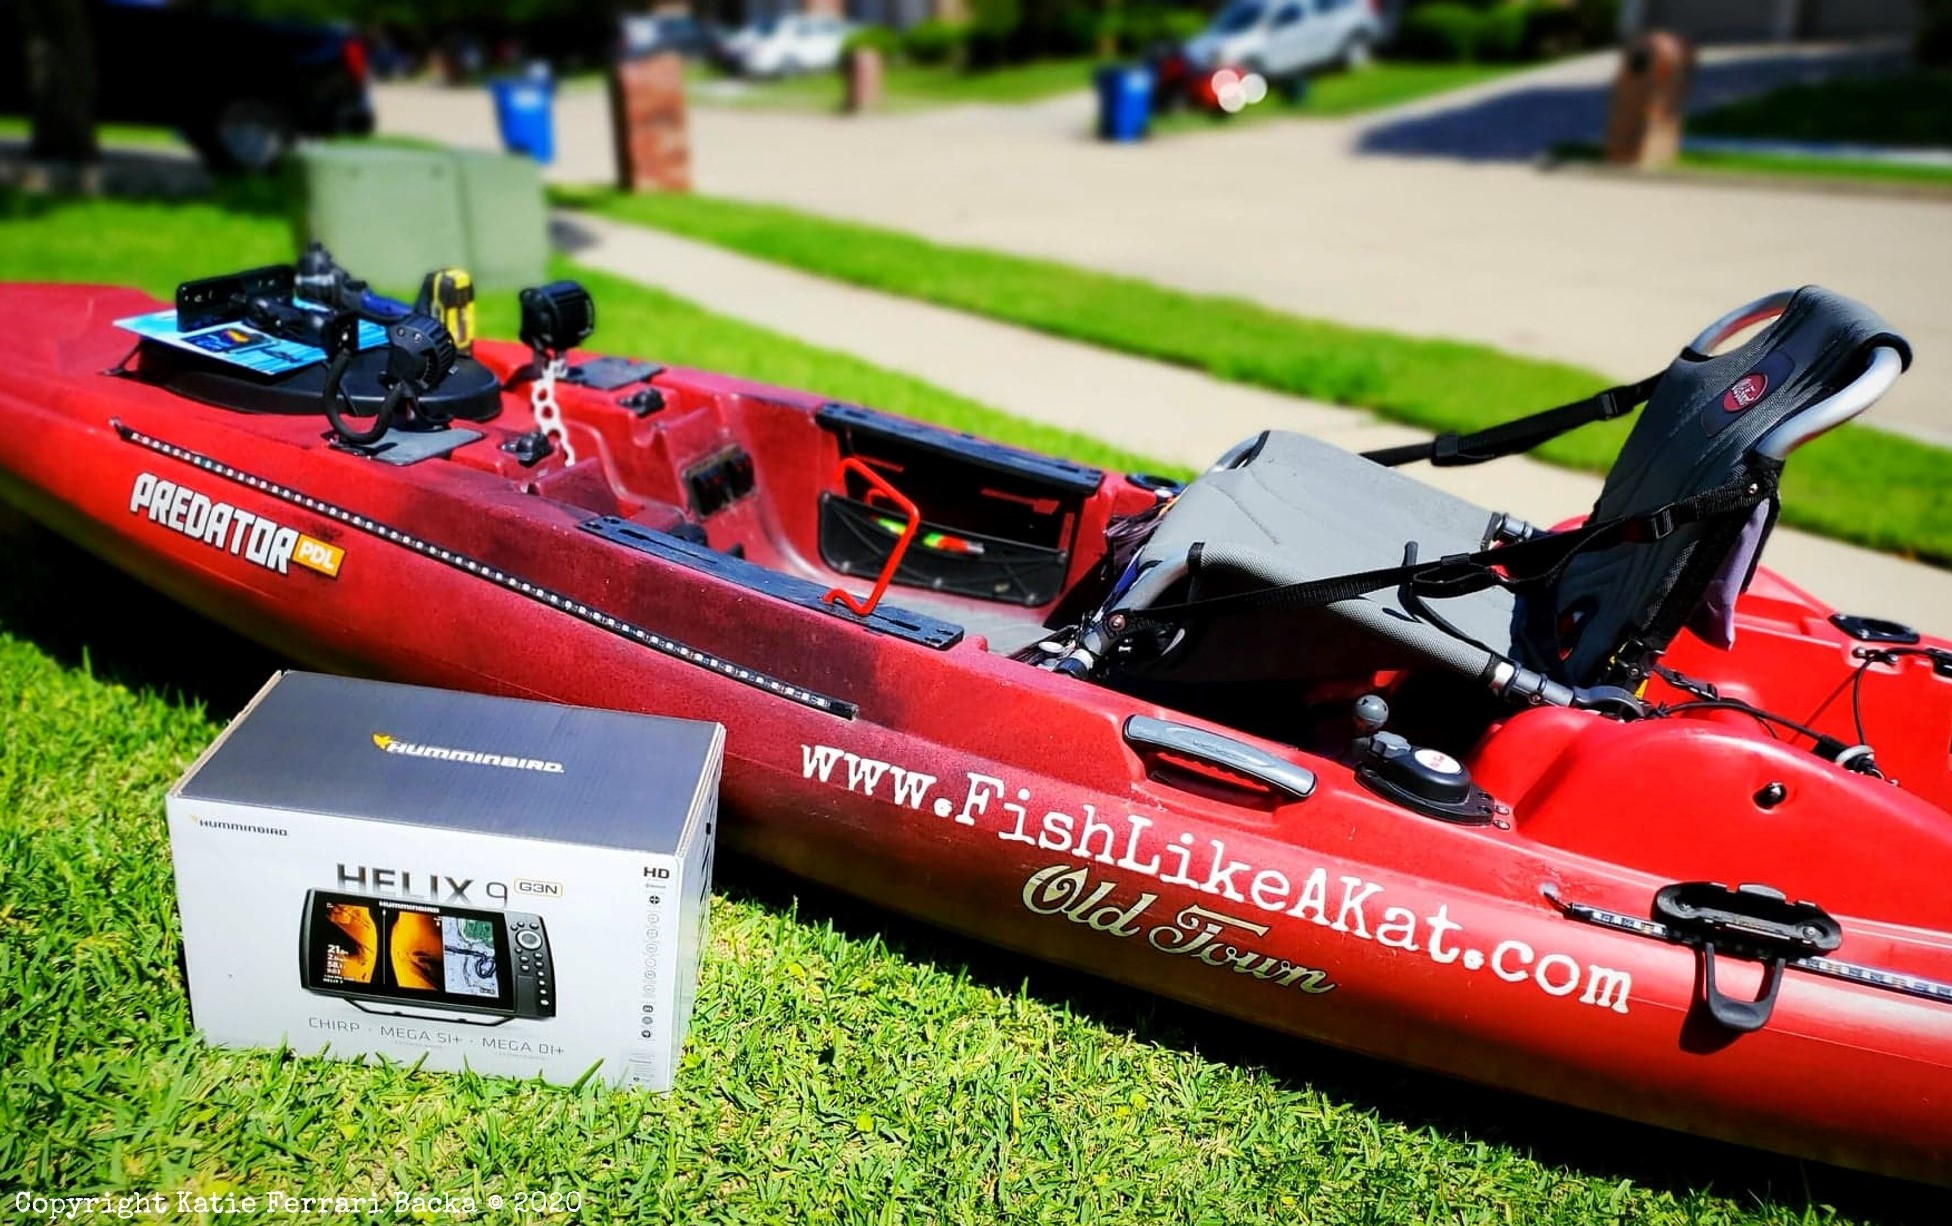
To do this, flip your kayak on its side, and look at the shape of the hull - on an Old Town Bigwater PDL [formerly known as a "Predator PDL"] there's very obvious channels on either side of the hull - measure the distance between the two channels, and that will be the width you'll need to attach your bunks.
Make sure to leave enough length on the bunks on the backside of the trailer - this will make it easier to load them into and out of the water.
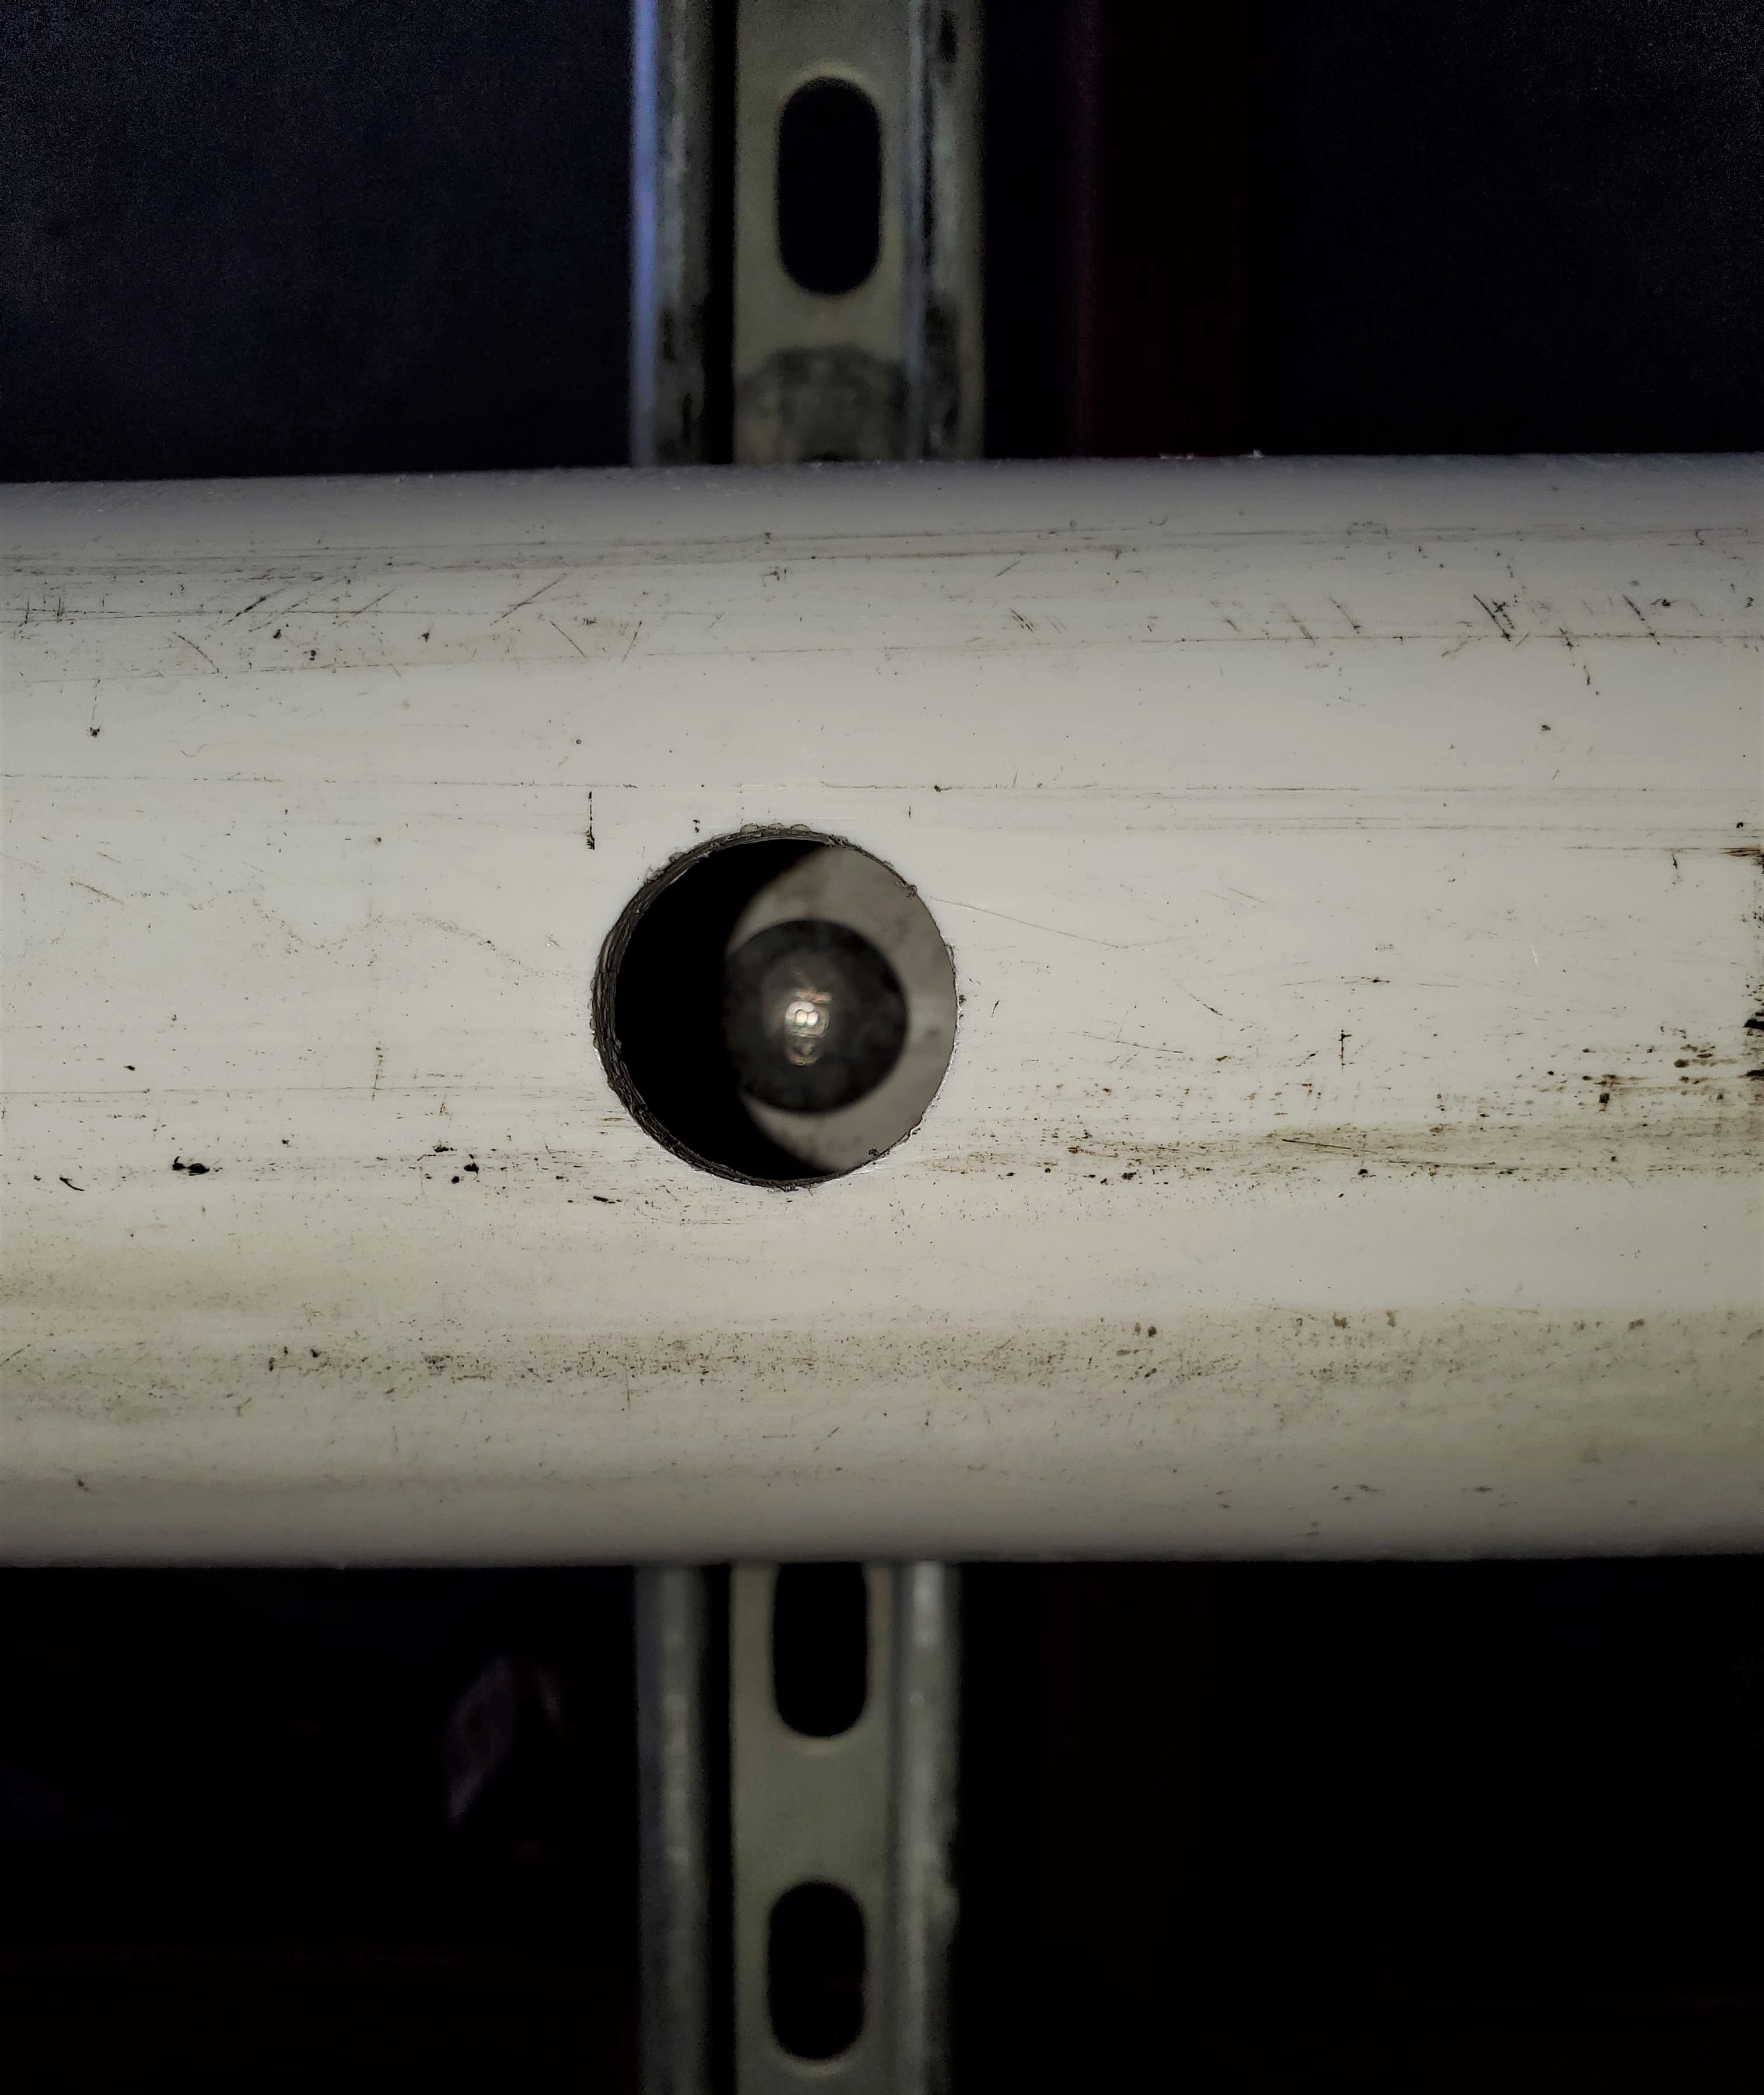
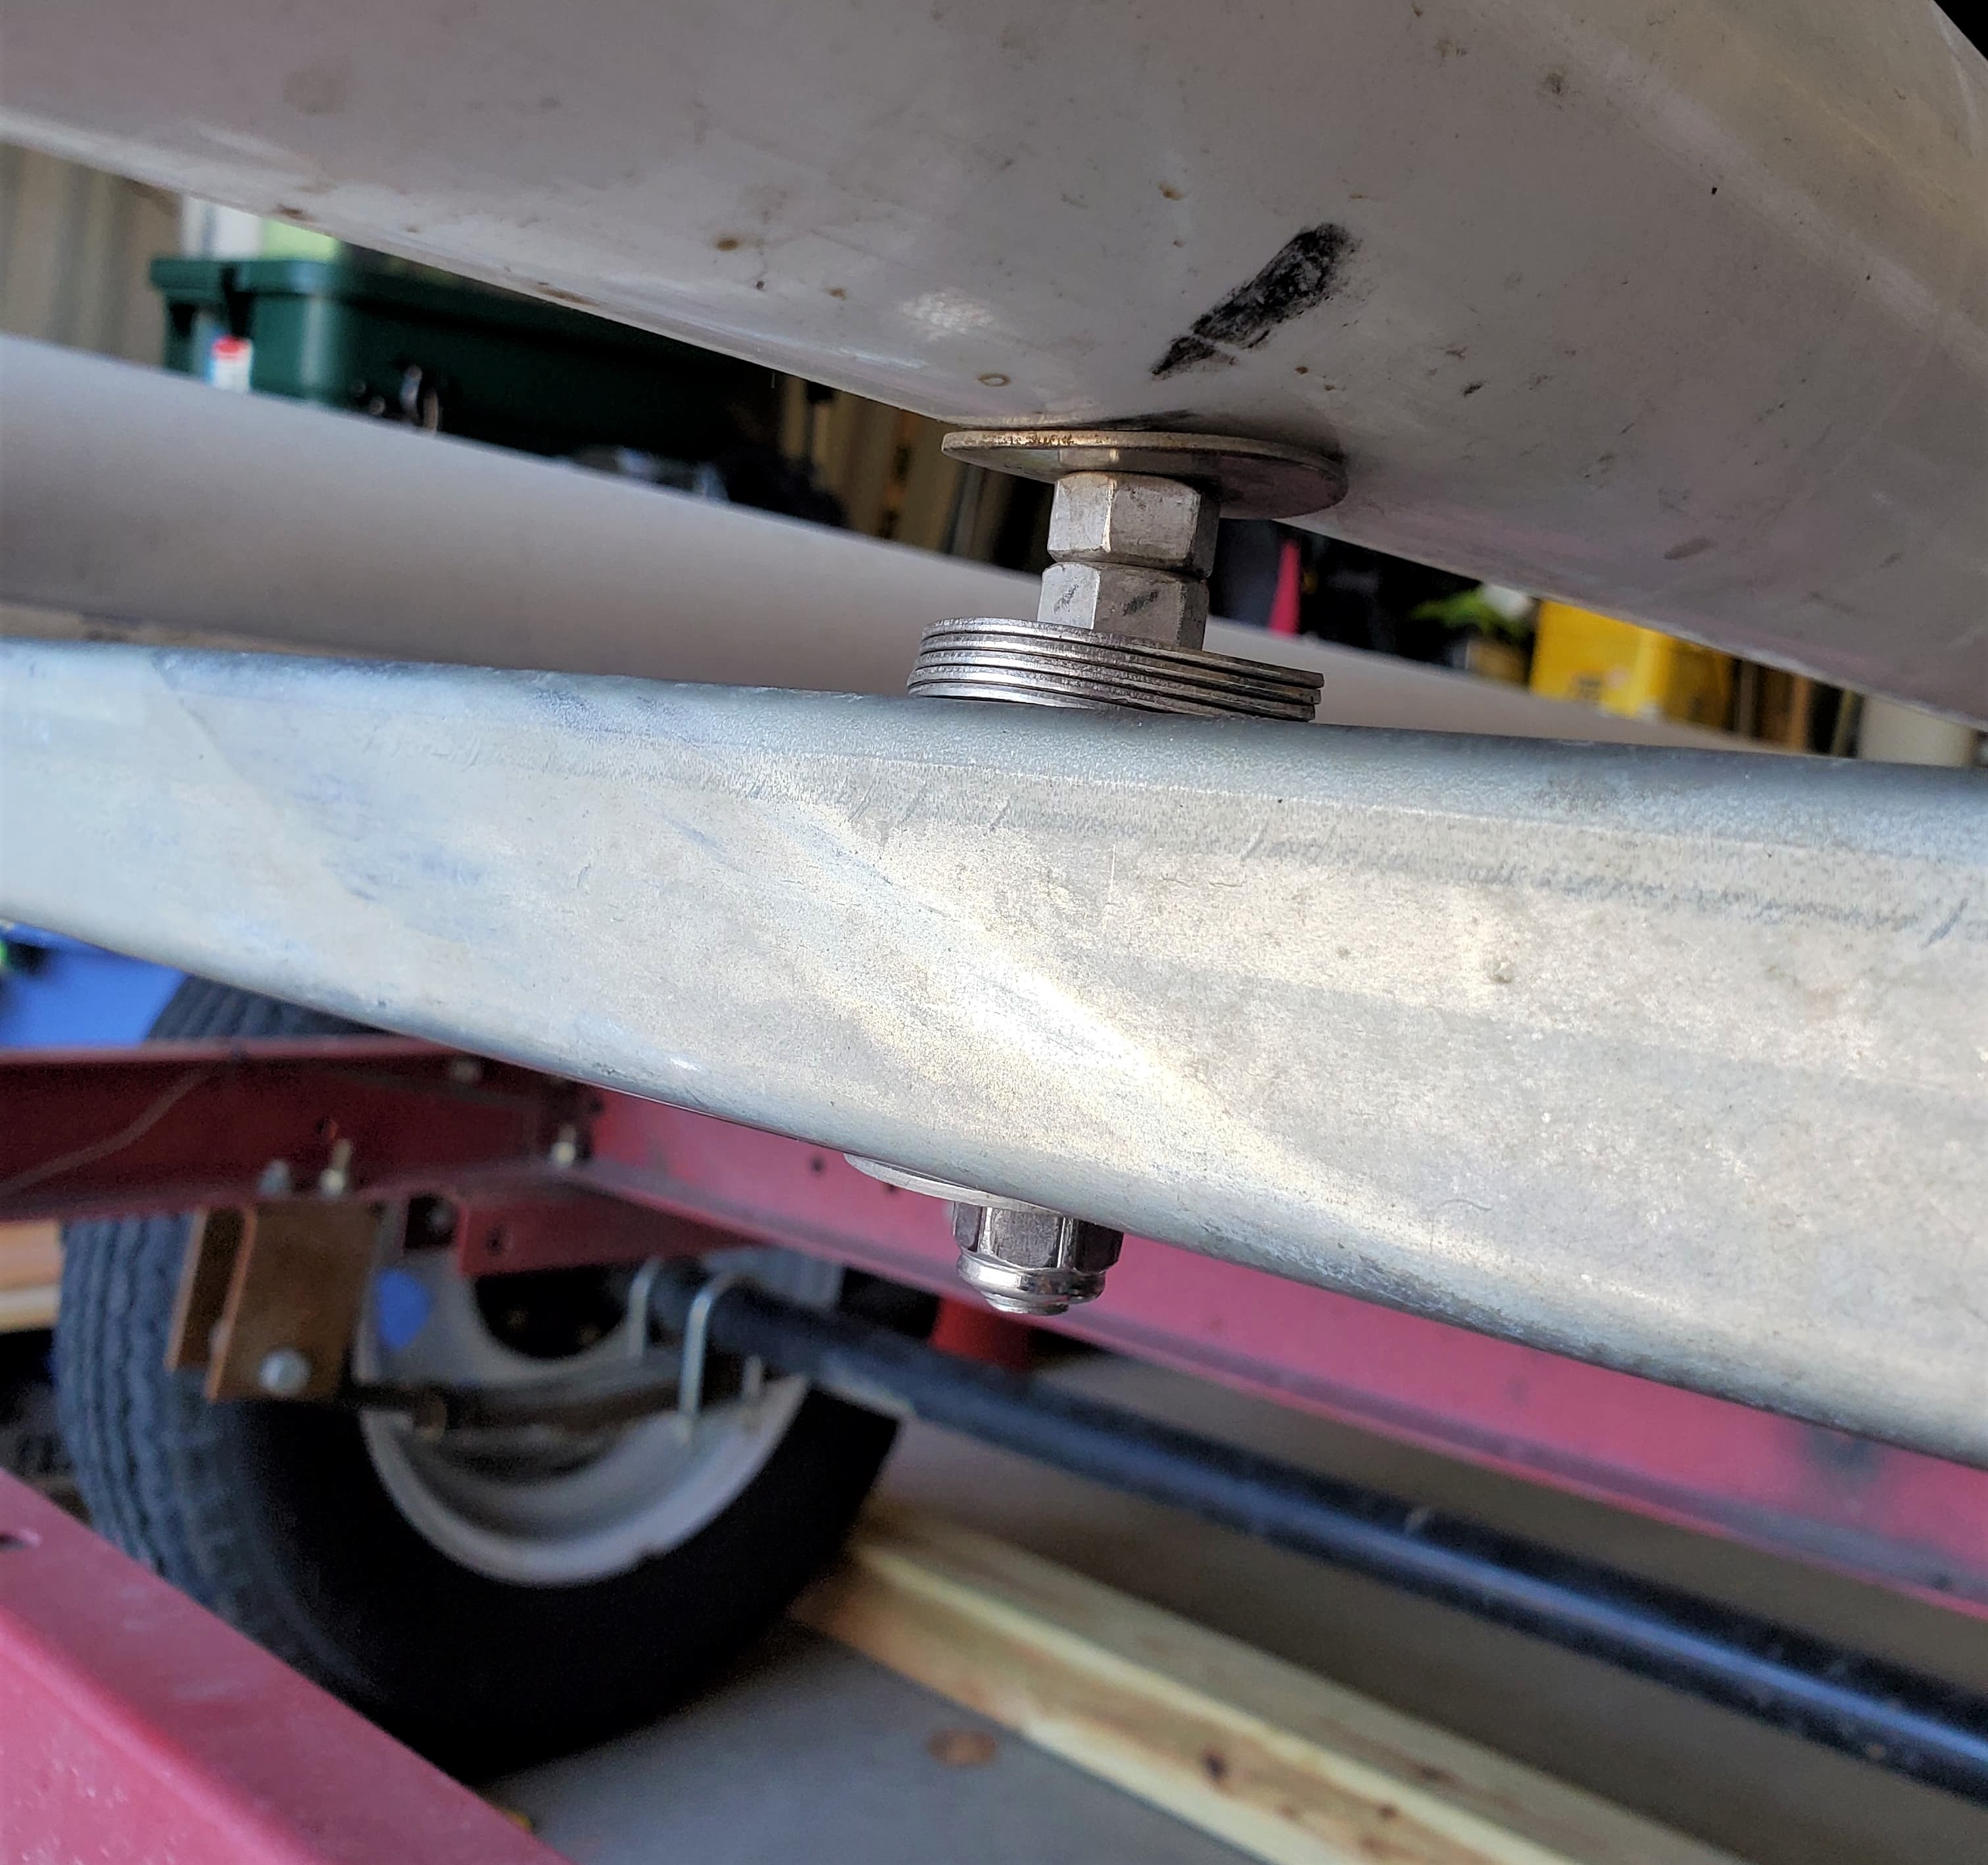
Attach the bunks to the struts by drilling a hole into the top and bottom of the PVC pipe - make the top hole larger than the hole the bolt will go through so you're able to drop a carriage bolt through the hole. Secure the bolt with a washer and nut on the underside of the strut.
Initially, we had the bunks tight to the struts without a gap in between the two - but when we would launch our kayaks, the transducer cut-in on the hull of the boat was occasionally catching on the back strut, so we had to "lift" the pipe up an inch or two off of the strut- which we did with a stack of washers and extra nuts. Is it the best way to accomplish that? Maybe not. But after trying a few different fixes over time, [and having them fail] this has been the strongest fix for us.
At this point - you're pretty much done with the hard stuff!
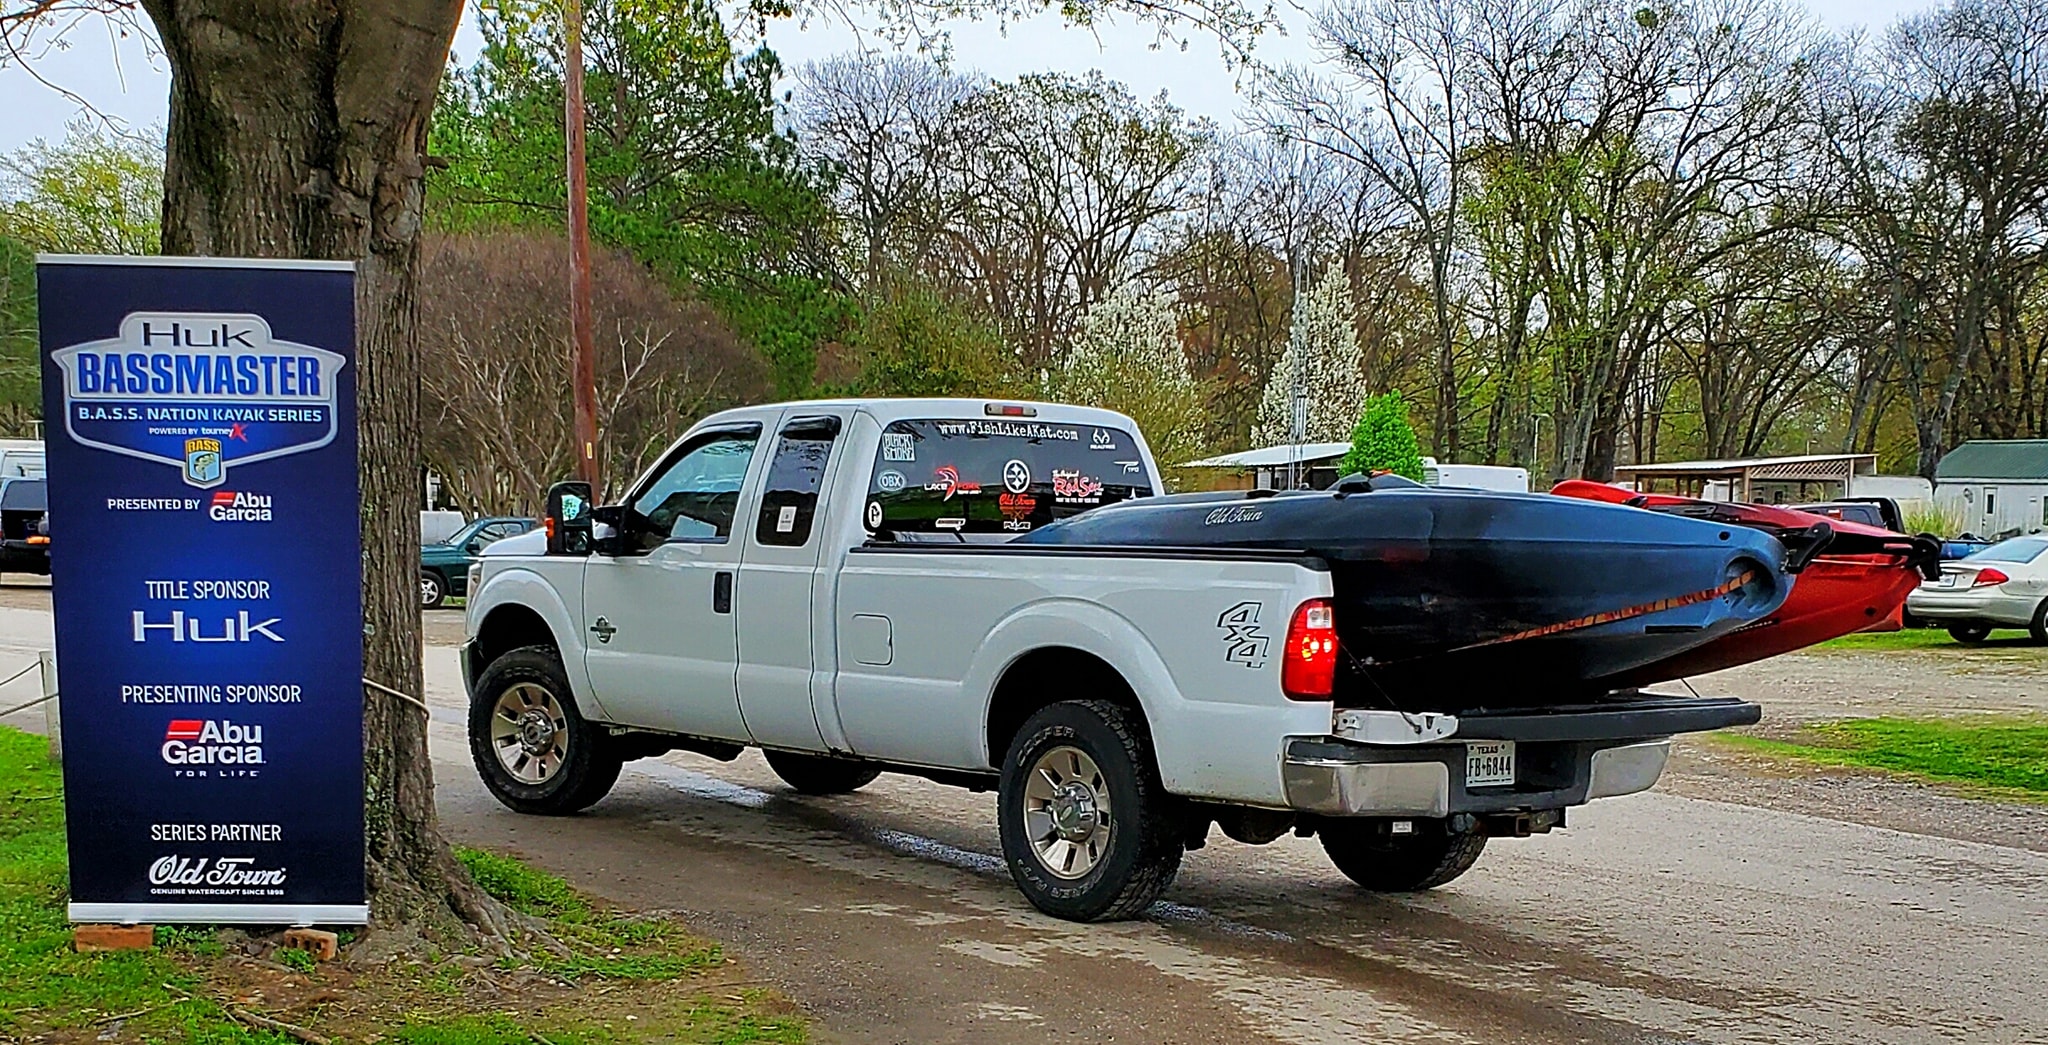
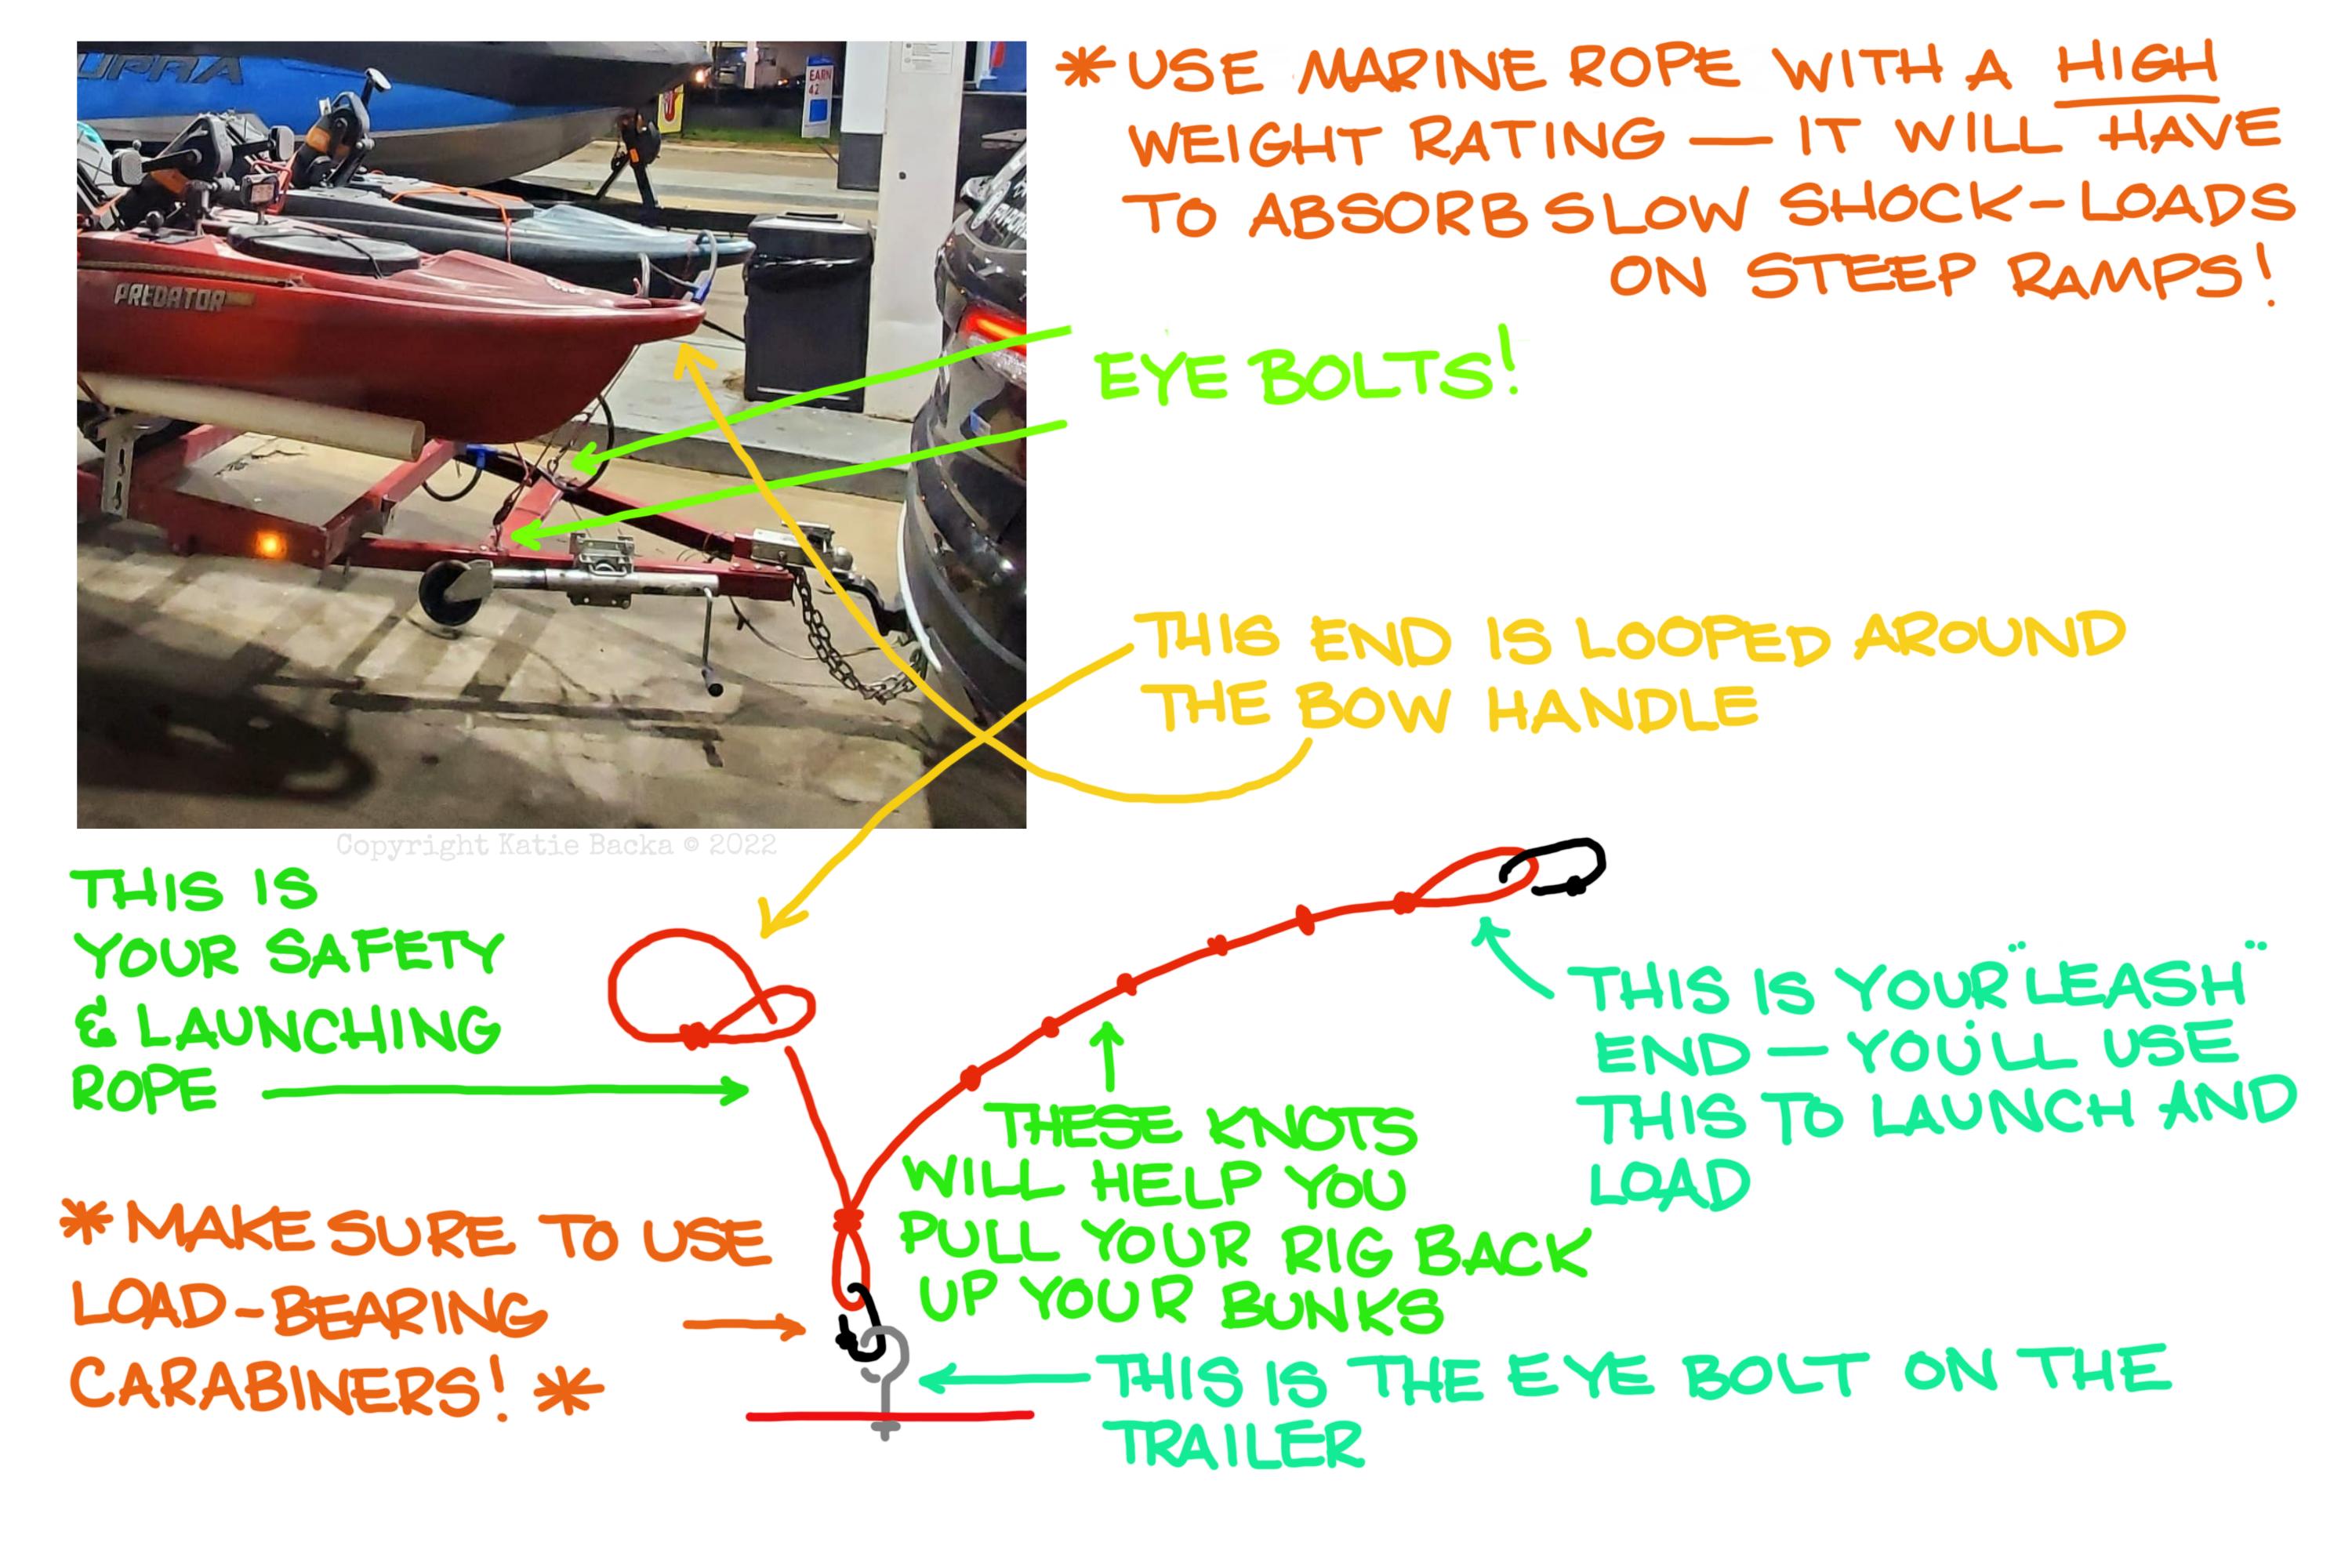
The only thing you have left to do is put your kayak on the trailer, and figure out the best place to attach your eye bolts to the front of your trailer - which you'll use to clip a rope to, to keep your rig from sliding off of your trailer when you back it down a boat ramp.
When you choose a rope, make sure to get a marine rope that has a high weight capacity - same goes for the carabiners - because these will be holding the weight of your fully rigged kayak while you back down the ramp and into the water.
Always secure your kayak(s) down with cam straps when you're driving! We like to lace them up around the struts, with one on the backside of the kayak, and one over top of our pedals on the front side.
Etiquette tips:
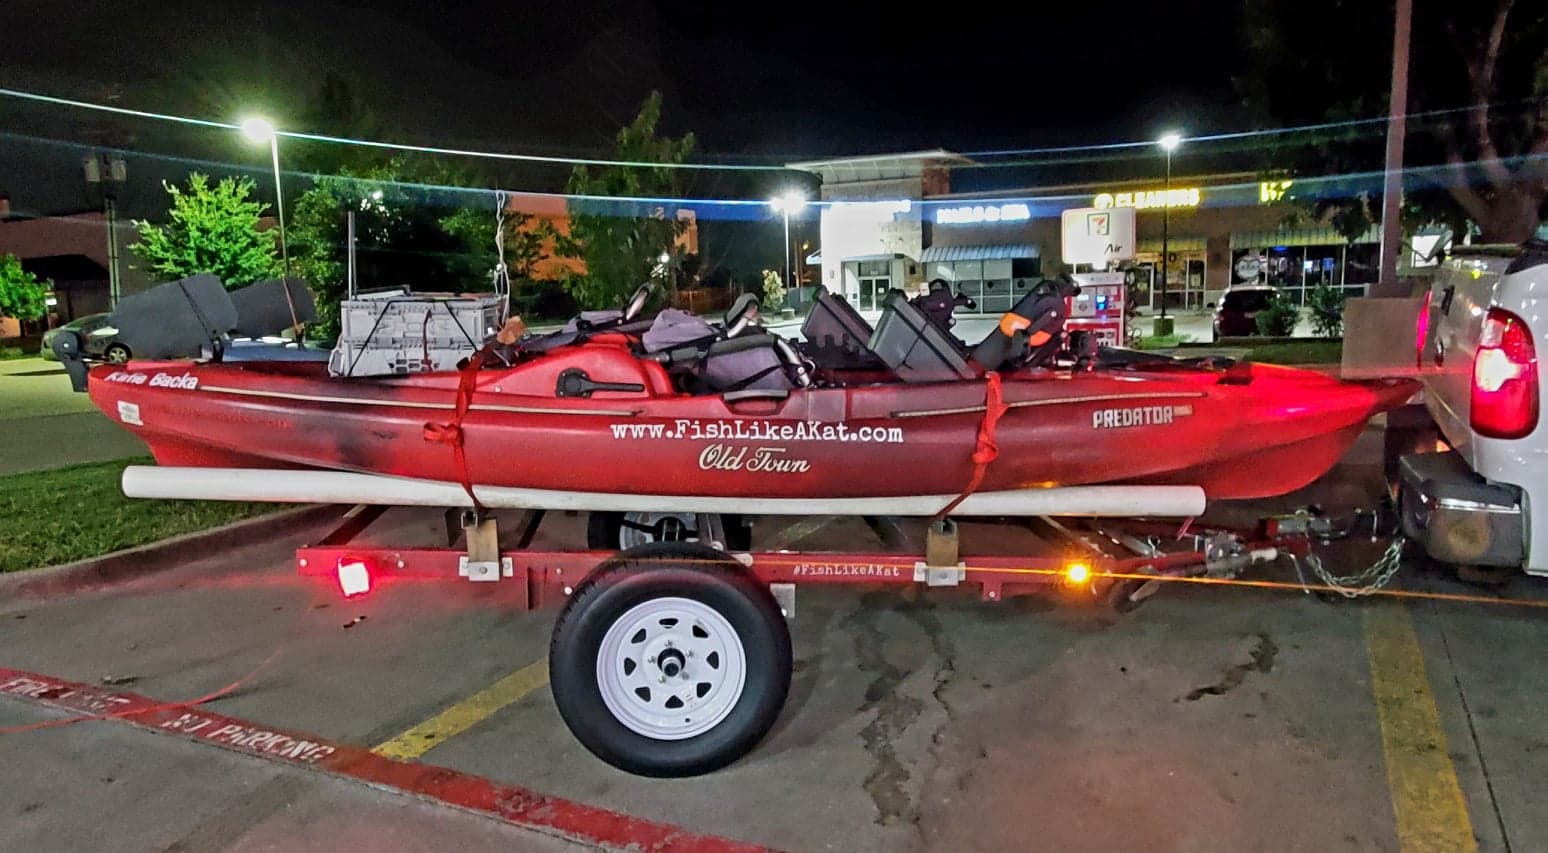
When you arrive at the ramp parking lot, get in line for the ramp - undo your straps and rig your kayak up completelybefore you back down the ramp!
RAMPS ARE FOR LAUNCHING - NOT FOR RIGGING!
The same courtesy should be taken when you take out at the end of the day...when you get out of your kayak, make sure to pull the drive and the rudder out of the water, so you can easily "point and push" your kayak towards the end of your trailer [while holding onto your kayak leash].
Once you're lined up, pull your kayak up the bunks, and clip it into the eye bolt. Once you're clipped in, drive up into the parking lot and off to the side to unload your gear.
Overall, this trailer is great for local fishing with the occasional trip, but if you're launching 150+ days a year all over the country, you'll want to stay tuned for part 2 of this article!!
Tight lines, y'all!!
Kat
You may also like...
When It's All Gone in 60 Seconds...
March 9, 2020
Kayak Fishing 101:
Tournament Trail Series - Explained!